Friday, December 1, 2023

Scaling Your Controllers when they are Connected

 Sometimes when you are working on a rig, you may need to go back and adjust your controllers size a little bit.  This is possible without breaking them but you cannot simply just go in and scale them as this would cause the controller to break and it can make your character or asset manipulate when you try to scale which is not what you want.  

To start off, one important method you need to know about is going into component mode.  This will allow us to scale our controllers without breaking them or having them manipulate our asset/character.  This method also won't put a scale value on our controller.  If you don't know where component mode is, it is always towards the top right under the windows tab.  It's icon looks like this .  Once in component mode, you need to select all of the vertices and then you can scale and adjust the controller as much as you like without breaking it's functionality.  

Component Mode Example

Another important setting you need to remember is object and world space.  This can affect your controller if you try to scale it and on the wrong setting.  It can cause your pivot to move especially if you are grabbing multiple controllers.  To make sure you are on the right setting, you can double click on your scaling tool and make sure that the Scale Center is at Object. 

Scaling Tool Settings

Now there is another way to actually open these settings if you are someone who likes to know how to open settings and windows multiple ways.  The second way to open this window is to push the Toggle Tool Settings Icon.  This icon is located in the top right corner of your maya window under Workspace.  It looks a little bit like a hammer.  When you click on this icon, you need to be using scale.  It will open the scale settings then.  If you are on rotate or translate it will open those settings.  You can switch to scale while the window is open and it will update.  

Toggle Tools Settings


Sunday, July 10, 2022

Kiss and Make Up Dance Pass 5


Kiss and Make Up Blocked Animation Pass 5

Autodesk Maya 2022 Arnold Renderer Single Frame Render Test

For this pass I focused on just blocking the hands of the character.  While I still have a long way to go with this animation I have come to learn just how details in the hands can really give some personality to a character.  As I was studying the dancer from my reference I was noticing that he does a lot of pointing, spider-man finger pose, and the okay hand pose.  I personally found this detail about the dancer to be very interesting and how quickly his hands actually are able to change poses so quickly in some spots.  Definitely the most difficult part for me to get right is when his hands are on his hips or thighs.  Zio is a very thin character and I've come to find that his hands are larger than you think so his hands cover his thighs.  I think that part of the dance where he does have his hands on his thighs or on his hips is an area that I definitely will need to spend more time on.  Some of the problems I ran into while blocking his hands is that sometimes his fingers would break where the geometry would crumble inwards and I found several ways to fix this issue, the most effective way being to either set all his value to 0 or rotating his fingers completely around and seeing the geometry return to normal and then zeroing out the values.  I also fixed the issue where the character was very shiny when doing a single frame render test with Arnold.  I fixed this by adjusting his materials in the hypershade.  The next big thing I will be working on this animation is his arms and taking a look at how his hair is moving.  For anyone who doesn't know the Zio Rig is by Hernan Ares.  My choreography reference is from 1MILLION Dance Studio starting at 1:58.  The song is called Kiss and Make Up by Black Pink and Dua Lipa!

Saturday, March 12, 2022

Pixar's Renderman: Analytic Lights and PxrMeshLight

 When I was learning Pixar's Renderman for my student film Delivery, during my research I learned about analytic lights and how they effect render times.  I am not a lighting artist but its still very good to know how Renderman calculates lights especially if you have a special case that is uses lighting differently. 

The primary mode of lights in renderman are called analytic lights because they are economical to render time.  They are highly mathematical modeled lights, highly efficient, and they use aerial lights.  Thus they are calculated cleaner and give us a faster result. 

    Analytic lights include:

  • PxrRectLight
  • PxrDiskLight
  • PxrDistentLight
  • PxrSphereLight
  • PxrDomeLight
  • PxrPortalLight
  • PxrEnvDayLight


Autodesk Maya 2022 Renderman's Analytic Lights

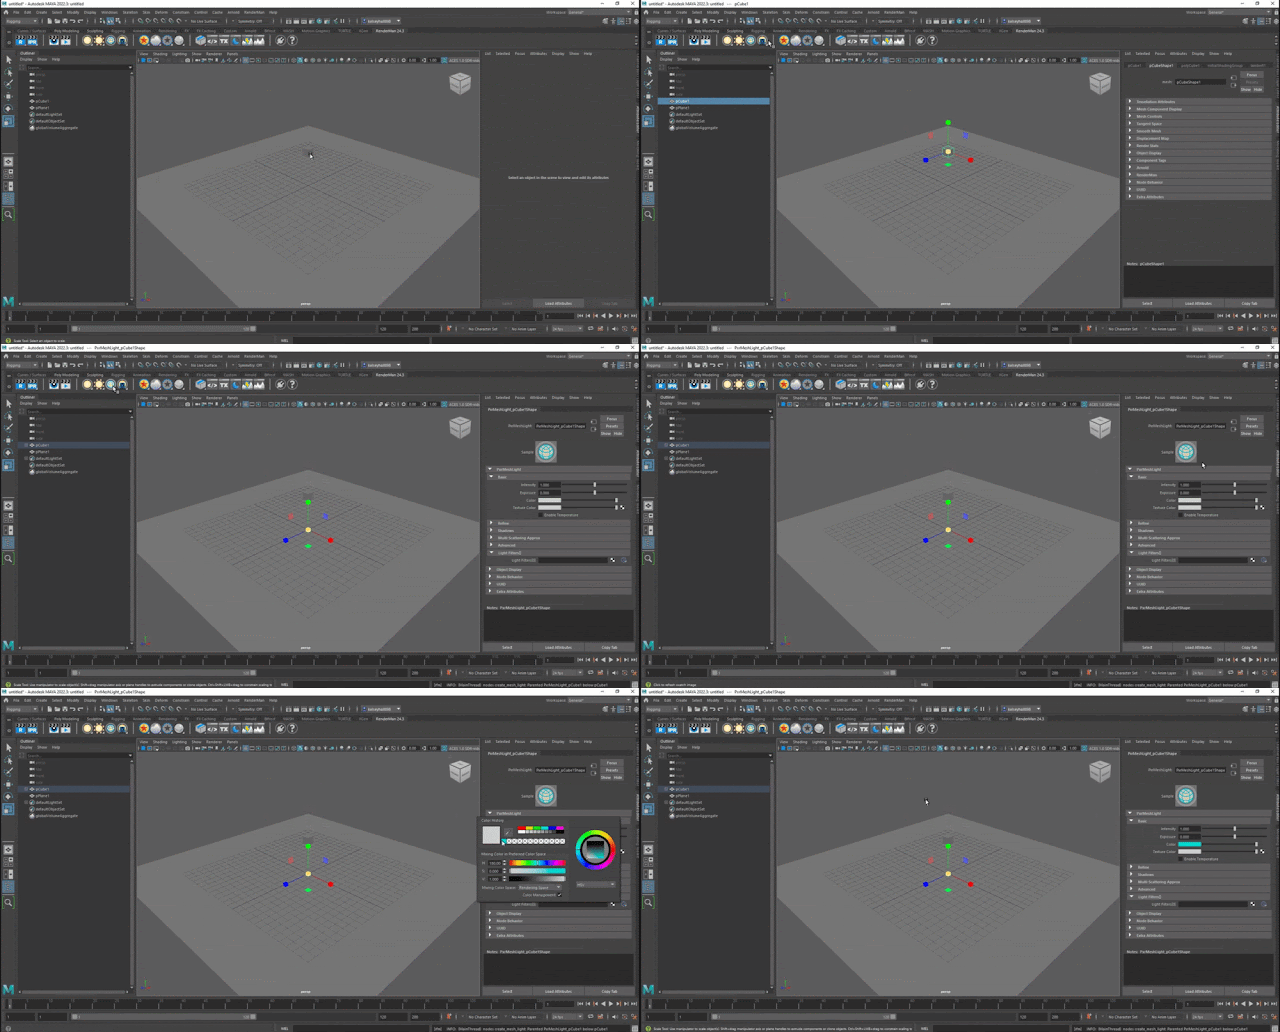
An example of a light that isn't analytic is the PxrMeshLight.  If you use this light, you won't get the same speed and cleanliness in the scene.  What the PxrMeshLight does is it makes objects emissive.  It's better than a glow material but it is not economical like analytic lights.  This does not mean to not use this light, sometimes you do need to use this light for objects that are illuminating.  

How to use the PxrMeshLight: 
  1. Select an object in your scene.
  2. Select it's icon on the Renderman shelf. 


    3.  To edit it's settings, simply click on it's node under the object you put it on in the outliner. In the channel box you can edit each of the settings. 


Gif of Autodesk Maya 2022 Applying the Renderman's PxrMeshLight


Autodesk Maya 2022 Example of Renderman's PxrMeshLight

Sunday, February 27, 2022

The Difference Between FK and IK Controllers

 If you are an animator or someone who is very into rigging, then you have probably heard about FK and IK controllers.  This is just a short write up about the differences between FK and IK controllers with Lucy from the Delivery project as an example.  

Forward Kinematics or FK controllers are often times used when creating expressive animation.  These controllers are very good at capturing realistic movement.  The logic behind these controllers is that the top controllers holds all the controllers underneath it.  It's a parent-child relationship!  Because of the nature of the parent-child relationship they are animated through rotation.  While these are all of the positives about this controller set up, FK is not very good when you need a character or object to rest their weight on something.  You will need to counter animate.  

Autodesk Maya 2022 Gif of Lucy FK Controllers

Inverse Kinematics or IK controllers are used when you need something to independently "stick".  These controllers are interesting because the top controller is independent of the bottom controller.  When you move a controller anything between the two controllers is being solved by the computer.  It is sticky so for example if you put a hand on a table and you try to move the table the hand will go with it if parented.  Because of the nature of how it works, you are animating through translations.  This type of controller does require a more complicated set up and it is more difficult to get realistic animation when you aren't resting weight. 

Autodesk Maya 2022 GIf of Lucy IK Controllers

Rigs can be built with both FK and IK controllers.  Somtimes they may be built with only FK or only IK.  In some cases if you character or object has a specific movement you may even have other set ups such as FK space.   


Thursday, February 17, 2022

Idle to Walk Mocap Animation Part 2: Adding the Character

Motion Builder 2022 Trimmed and Plotted Azura Walk Animation

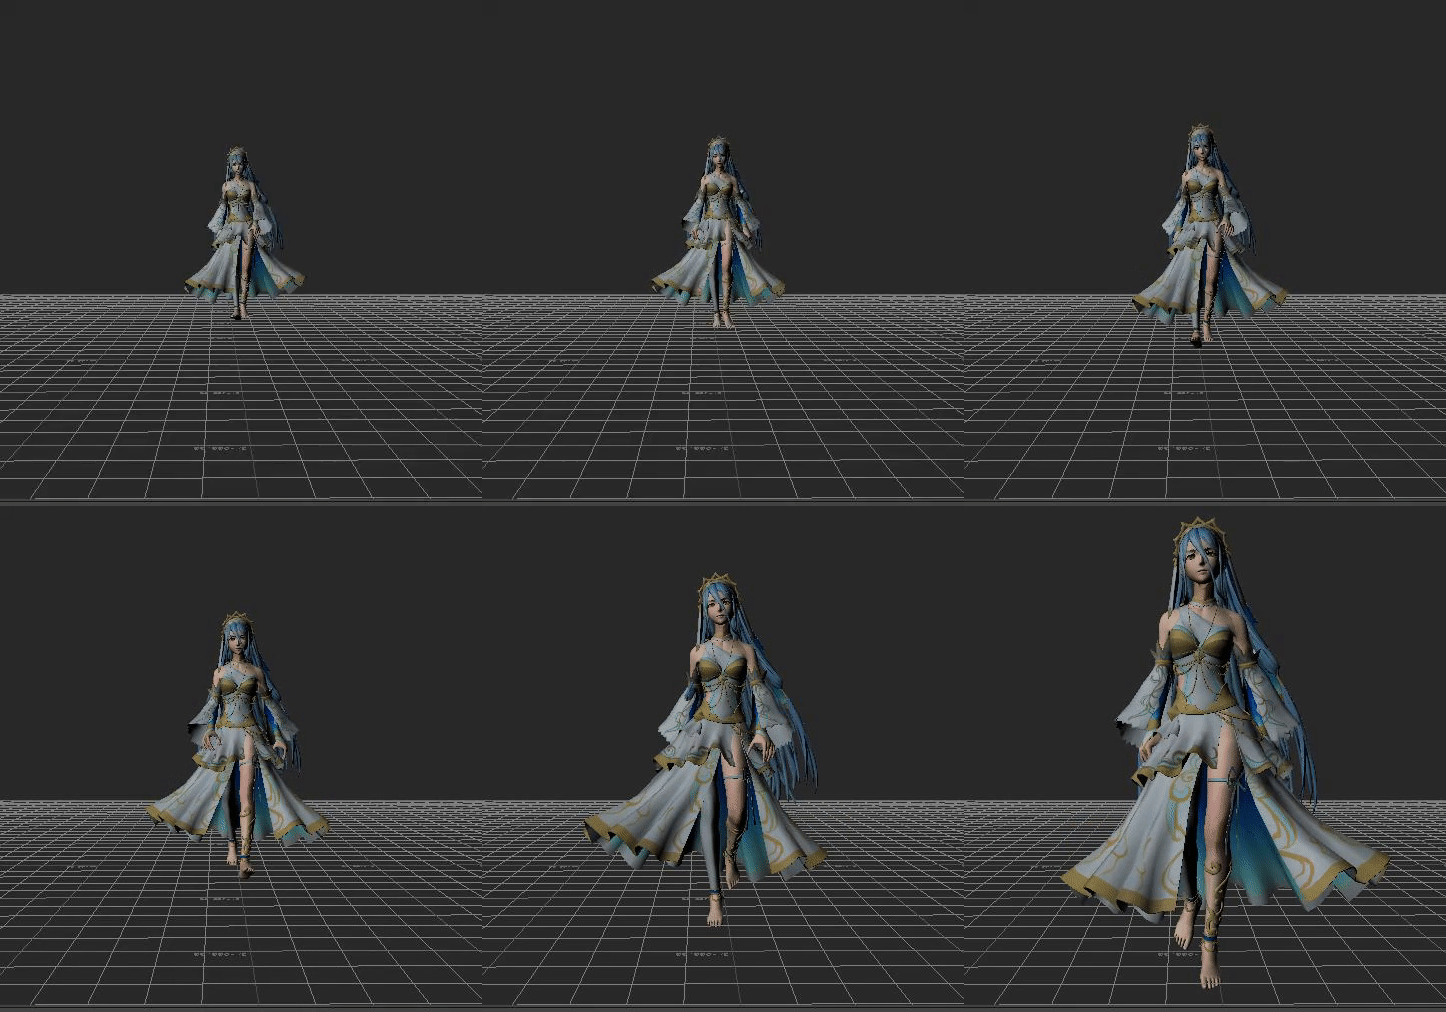
For this week I chose to work on adding the mocap data to a character.  For this animation, I worked with a character named Azura who you may recognize from the Fire Emblem series.  This rig is of her special costume and I got her rig from my grad school mocap rig library.  I though she had a very cool design and she also had some very interesting hair and clothing.  I find hair and clothing very interesting and something I want to learn more about so working with her would give me some more insight on how hair and clothing work when it's time to work with both of those areas.  

To start off I open Azura in motion builder.  I then also add my folder path to my cleaned and characterized mocap data in the asset browser so that it is easier to work with.  After adding my folder path, I drag one of the mocap animations onto the scene and FBX merge.  

Motion Builder 2022 Azura and Mocap Data Rig


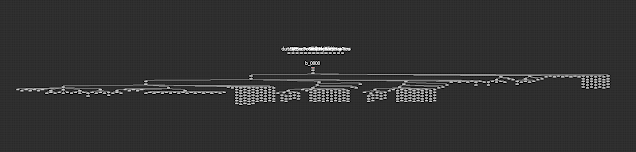
From here I select my character in the navigator outline and switch her Input Type to Character under the Character Settings.  I also plot the character so I can delete the mocap data from the scene.   After I plot my character I opened my schematic and deleted the mocap data.  Azura has many nodes in the schematic view!

Motion Builder 2022 Cleaned Plotted Character Schematic

After I plotted my character, I created a new folder for my plotted scenes and saved my scene.  I did the same process for my other animation before I moved into trimming the animation.  

Motion Builder 2022 Short Gif on Azura Idle Animation

Motion Builder 2022 Short Gif on Azura Walking

Once I got both of my animations plotted I began to look at where I could begin trimming.  Because these animations weren't given direction when shooting the mocap, I will have to copy some keyframes for when I merge the two animations together.  What I mean by they weren't given direction I mean that the actor wasn't told to lower their arms first from T-pose before beginning to walk.  
Once I find the frames that I want to cut using the cut filter, I set my set start to 0 and my set stop to the frame I want my animation to begin. I then used the same technique to cut off the animation at the end.  For the walk I kept it simple and short.  For the idle I'm going to be showing that one's trim in the next post!

Motion Builder 2022 Azura First Walk Frame After Getting Trimmed

Sunday, February 6, 2022

Idle to Walk Mocap Animation Part 1: Cleaning and Characterizing.

Motion Builder 2022 Short Gif Cleaned and Characterized Walk Animation

Motion Builder 2022 Short Gif of Cleaned and Characterized Idle Animation

I decided that I wanted to gain some more knowledge about mocap animation and learn about the animation process in motion builder.  To start my journey on learning more about this area, I started simple with just a basic walk and idle animation.  I'm starting these animation off separately before I combine them into one.  While I was in grad school,  I went to some of the lectures about mocap animation.  I never got to finish any of the animations but I did learn a lot from my professor.  

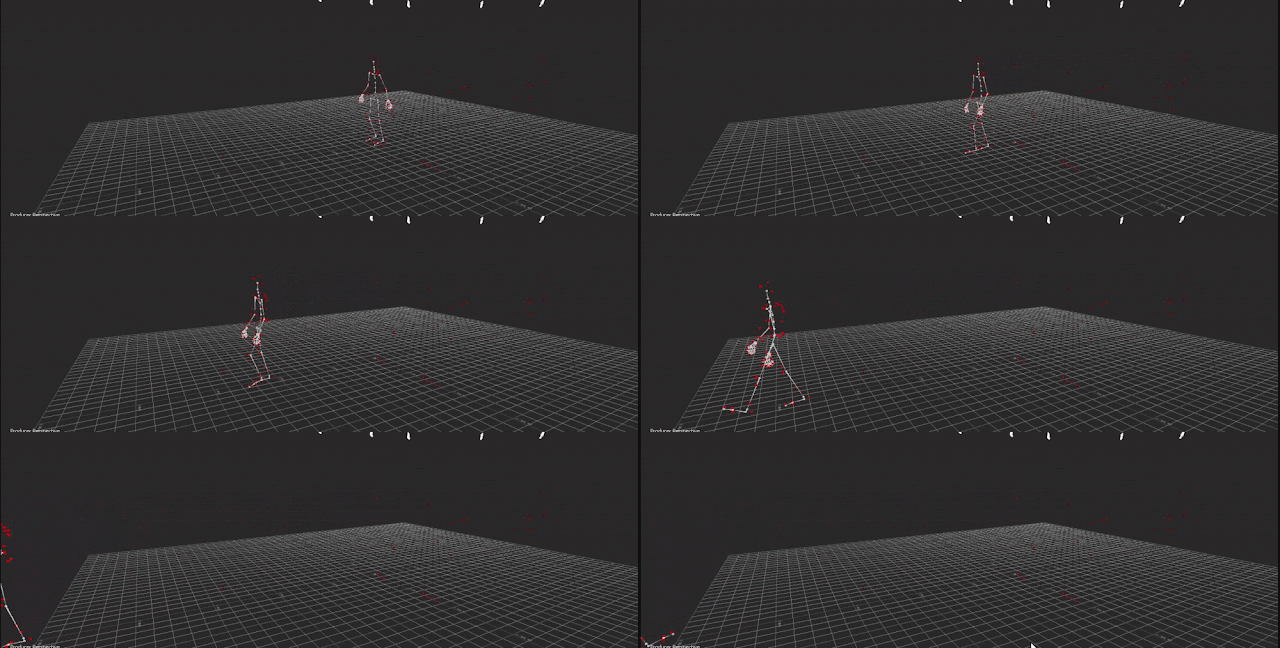
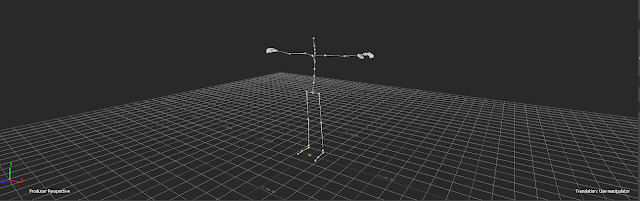
To start off, I found my mocap data from the animation I started in grad school.  I'm starting from the very beginning where I have to clean and characterize the data.  I see many red dots in the scene which is data I need to clean.

Motion Builder 2022 Original Walk Animation 

To begin cleaning the scene, I first start with opening the schematic.  I deleted the system, unlabeled markers, markers for props that were not used, and the markers that were on the actor.  

Motion Builder 2022 Unclean Schematic View

Motion Builder 2022 Clean Schematic View 

Motion Builder 2022 Clean Perspective View

To take the cleaning process a bit further, I characterized the scene.  Characterizing allows me to label the joints to transfer the data to a mocap rig.  I first set the starting frame at 0.  I also zero out all of the rotations.  I then selected just the hip joint and rotated the X 90 degrees. Next selected everything and keyed it on frame 0.  Finally, added a template character and renamed it Mocap so I know what the mocap data is.  At this point I save my cleaned file in a new folder. 

Motion Builder 2022 Cleaned and Characterized File

I then run through this very same process for my idle animation.

Motion Builder 2022 Original Idle Animation Short Gif

Monday, January 31, 2022

Jaw Pivot - Good Way To Figure Out Where This Joint Should Be and The Effects You Get

 It's been a while since I have worked on this project.  Sometimes life gets a bit crazy and this is a project I am picking back up. When I was creating my joints for my jaw pivot, I learned something I didn't really think about too much.  I think about anatomy a lot when I work on a character by looking at several real life skeletons and looking at animation.  With the jaw pivot, the whole idea of where it can be placed to get different effects really got me thinking.  

When I placed my joints, I placed it based on realism.   I placed my jaw hinge joint close to the ear and close to where the neck would be connecting to the skull.  It's very similar to a drawing my instructor did in class.

Autodesk Maya 2022 Joint Placement

Drawing from Facial Rigging Class

A really interesting point about the jaw hinge that I learned is that they don't always just rotate.  They will also translate a little bit when it gets to a certain point.  For more realistic rigs, you can leave rotation and translation turned on so that it is easier for the animators.  Animators can adapt it a little bit.  I also learned that with realistic facial rigs you can create the jaw open with shapes and the motion would be build in.  

Cartoon rigs are different from realistic rigs because the design of the character will become a consideration on how you want them to move.  They may have a very long nose like Goofy or very long fingers.  This same idea applies to the jaw.  Where you place your jaw hinge will give you a different effect for how the jaw moves.  An example I looked at was if you wanted your jaw to move almost vertically, your pivot would have to very far away so that when you rotate it would move more vertical.  

Example of Jaw Hinge for Vertical Movement

Another example that was looked at is if the character was designed to have a very sharp rotation.  The pivot point would actually move further way from the ear and closer to the jaw.

Example of Jaw Hinge for Sharp Rotation

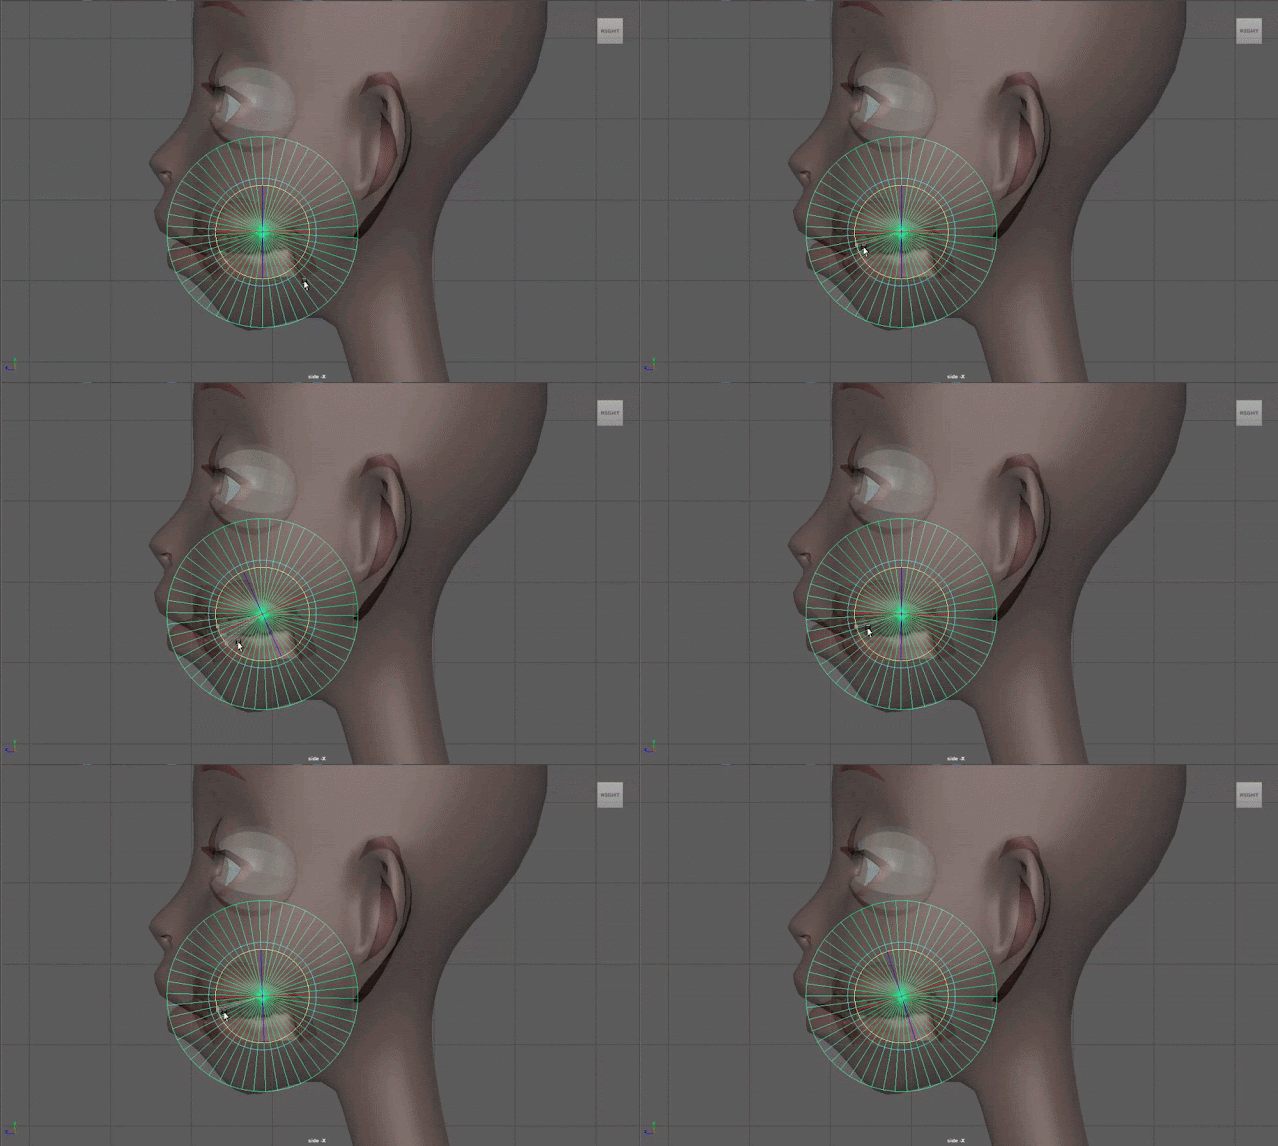
A cool trick that I tried for visualizing how the pivot is going to act is to bring a cylinder into the scene and then rotate it 90 so that it's on it's side.  You would be looking at the vertices that create the center of the cylinder.  Then bringing it up into the head geometry and turning on xray.  You can use the center, scale and place it where you think you want to put your jaw hinge joint.  Tip:  The more subdivisions you have the smoother it looks.  Then rotate the cylinder, this will give you an idea as to what kind of effect you will get. 

Gif Example of Sharp Rotation

While I haven't had the experience of creating a rig with a vertical movement or a sharp rotation, I found this to be very interesting and hope I can create a rig with these effects in the future!

Tuesday, January 25, 2022

Resetting Transformations, Freezing Transformations, and Matching Transformations in Autodesk Maya

 When working in maya you may use several transformation tools to help with your workflow.  The three translation tools I want to talk about are the resetting transformations, freezing transformations and matching transformations.  These three tools are very powerful and help you work in maya in many different ways.  I used these tools in my school days a lot and still do on the daily.  

Resetting Transformations is a tool that put your manipulator tool back at the origin in maya.  So back on the center of the grid.  

How to reset transformations:

  1. Select an object you want to reset the transformations on
  2. Go up to Modify 
  3. Select Reset Transformations
Autodesk Maya 2022 Reset Transformations Tool


Freezing Transformations tells maya that the point where the object is, is the origin.  So if you move the object you can zero out the transformation, scale, and rotation and it will go back to where you froze.

How to freeze transformations:

  1. Select an object you want to freeze transformations on
  2. Go up to Modify
  3. Select Freeze Transforms. 
Autodesk Maya 2022 Freeze Transformations Tool

Matching Transforms is a tool that I learned recently from a friend of mine at work.  Matching transforms copies the translations from one object to another.

How to match transformations:
  1. Select the object you want to transform and then the target you want your object to match.
  2. Go up to Modify and scroll down to Match Transforms.
  3. On the side pop-up you can select a variety of ways you can have your object copy the transforms
    1. Match all Transforms
    2. Match Translations
    3. Match Rotation
    4. Match Scale
    5. Match Pivot

Autodesk Maya 2022 Match Transformation Tool.

Each of these tools are incredibly powerful and helpful when working in maya.  If you are a tech artist, you may recognize that each of these tools utilizes different matrix. 

Tuesday, January 18, 2022

Maya 2022: Unable to Playblast using Quicktime and H.264

If you are someone who has used maya for a few years you may have noticed some changes to maya 2022 and maya 2020.  One of the changes I have come across when playblasting my dance animation to Kiss and Make Up, is that QuickTime is no longer an option in the playblasting options.  If you are newer, you would find the quick time option under format in the playblast settings and H.264 disappears from the encoding setting.  These settings are easy to get back but it does require installing QuickTime.  Quick note, I have found this issue on both PC and Mac computers.

To get the QuickTime option back is very simple.

For a PC:

  1. Start off with maya closed.  It needs to be closed because we need to install quicktime.  
  2. You need to visit the Download Quick Time page.  This download is on an apple support page and is only for PC.
  3. Push the big download button on this page and install quick time.  
  4. Open maya and check both your playblast settings format and your render settings
For a Mac:
  • You need to follow the same steps above but you need to visit Quicktime Downloads by Apple support.

Maya 2022 Playblast Settings with QuickTime and H.264

Thursday, January 13, 2022

Kiss and Make Up Dance Pass4

Autodesk Maya 2022 Kiss and Make UP Animation Blocking Stage 4

Autodesk Maya 2022 Arnold Renderer Single Frame Render Test

This is an animation I started while I was in grad school but never got to get past the blocking stages.  This is very early stages of this animation as this is my fourth pass at blocking in all of the movement. I chose to do dancing for a high action animation because choreography has always fascinated me with the way the body moves to the music.  Dancing doesn't always make sense to me and I myself am not very confident about dancing.  When I first started learning animation, I did an animation with one of my best friends to this same song and reference video.  We both animated a character and brought them together.  This was one of my favorite memories from school.  This dance variation is further in the video.  The song is Kiss and Make Up by Black Pink and Dua Lipa.  The choreography reference is from 1MILLION Dance Studio on Youtube.  The rig is called Zio by Hernan Ares. 

Naming Conventions in Autodesk Maya

 When I was first learning maya, my classmates and I messed up the naming conventions a lot.  Especially when we were leaning animation and tried to bring reference into the maya scene.  I have spent hours troubleshooting why my reference won't appear in maya to learn that it was simply because it did not like what I named all of my tiffs. 

So what does maya not like in naming conventions? It's very simple once you know what to use and what not to use. 

  1. DO NOT have slashes.  PC and One Drive do not like slashes and it will not sync
  2. ONLY use underscores!
    1. Quick note about underscores, some maya naming conventions cannot have underscores either such as bringing in an image sequence.
      1. For image sequences use something like this: Project1ref
  3. NEVER name an objects or cameras Render.  This is more for in your actual maya scene but if you name something Render and you go to render your scene it will crash.  This happens because the code to render gets confused since it uses render to render.

Monday, November 29, 2021

User Set Up Code

I learned about user set up scripts when I took my first python class in CGMA.  The very concept of what this script really does and how powerful it is went right over my head.  I was a total beginner at scripting at the time.  When I was at FIEA working on my very first artist proof tool, which was my controller generator tool, I wanted it to have it's own shelf and to be able to update every time I open maya.  With this in mind I went back to my CGMA class and looked at how a user set up code works and then I began making my own one.  

My user set up code is not a script I show in it's own demo reel since it is very much a back end pipeline script and it is something I want to continue to grow and add more custom tools and shelves.  The user set up script is multiple scripts working together to allow me to have the ability to:

  • Have my tools update every time I open Autodesk Maya
  • Create a custom shelf that I can store all my custom tools in
  • Create a drop down menu that I can use to also access different tools and keep my tools organized
  • Have tools not disappear when resetting maya preferences. 
  • Easy to update my scripts to add more custom shelves and drop down menu options
So what do my scripts do?  Well, this is a quick break down of what they do and how they talk to one another.  

Two of my scripts are in a folder that I keep in a safe place and I label it something so that others would know to not touch that folder.  The reason for this is because if that folder or any of the scripts in that folder are moved, the user set up code will break.  

Do Not Touch Folder

So what's in this folder?  This folder holds all my scripts for my custom tools.  Any tool that I create and want to add to my user set up code will be added to this folder.  My other script that is in this folder is my script that creates both my shelf and drop down menu.  It also checks to make sure that I don't have duplicate windows open in maya and it connects my custom tool to both the drop down menu and the shelf.  It also adds a custom icon for my tools.  

Gif of Autodesk Maya 2022 Custom Shelf and Drop Down Menu

So what is my other script?  The script that does the magic of bringing my tools, shelves, and drop down menus is the script called the userSetup.py.  This code is placed in the maya application folder in the script folder for version of maya currently being used.  This file needs to be called userSetup because maya will look for this name and bring all of my scripts into the program. The userSetup script I created looks for my folder my tools and menu scripts are in and creates a new environment variable.  It then imports my menu and shelf.

These series of scripts is something I want to work on more to add my new custom tools and continue to learn about scripting in maya. 

Saturday, November 27, 2021

Rigging the Pink Haired Girls Face Part 2

 This week my goal is to create some blend shapes for my facial rig.  I will be using ZBrush to create all my shapes and then export them back into Maya.  

Maya 2022 Completed Blendshapes

Maya 2022 Gif of Head with Blendshapes

To start off this week I need to export my model into ZBrush.  I went back to my original file with my typology I used for my rig to make it easier to work with rather than going into my rigged file.  I will be exporting the basic model without the hair.  This includes the eyes, and teeth.

Maya 2022 With My Original Typology

To start my process of exporting my model to ZBrush, I cleaned up my scene a little to make it easier.  I combined the two eyes together and then combined the upper and lower teeth together.  

Maya 2022 Combined Geometry

For this next part I exported the eyes and the teeth separately as an obj.  I used the default settings for both of these exports.  Before I actually export my model I created some masking on certain areas on the face to help my workflow when I'm in ZBrush.  Doing this allows me to manipulate the face but not move areas I don't want to move. I selected the edge in the eyelids and then clicked to faces.  I then increased my selection and added a new material to the the selection.  I colored it blue so it's easier for me to differentiate my selections.

Maya 2022 Eyelid Mask

I then followed the same steps and created a mask for my lower lip/jaw.

Maya 2022 Jaw Mask

For importing my head into ZBrush I made sure that in my Preferences under Import I had the Import Mat As Groups selected. I created a Polymesh 3D and then imported the head.  For the eyes and teeth I appended a 3D star shape and then imported each of them.

ZBrush with Head Model

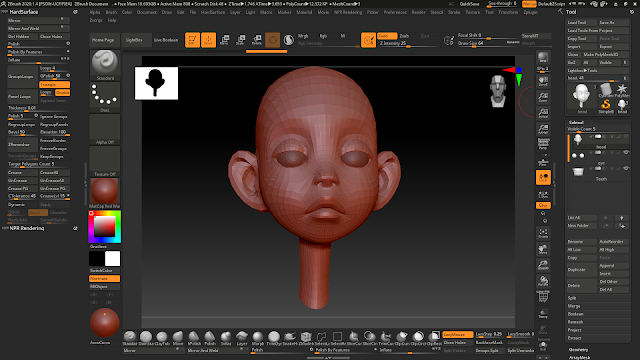
I then went into Edit Mode and pushed Shift + F to draw polyfill.  From my class I learned about the power of ctrl + shift + select for selecting parts of the face to isolate.  I then used ctrl to paint over them to create a mask.  To make working on the face easier I went up to Transform and turned on Symmetry.  I also created some layers to make exporting easier and so I can have many expressions in one file.  For the brush I'm using, I'm using the Move brush.
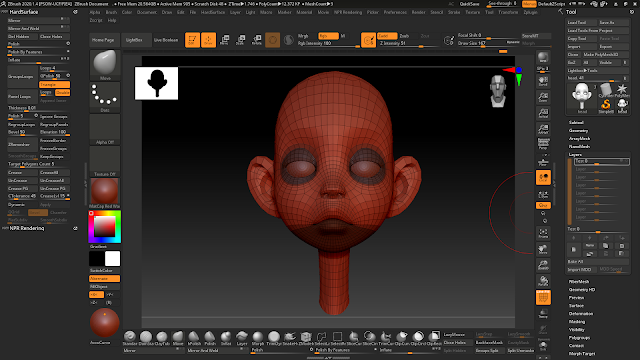
ZBrush File Set Up

Using the layers I set up, I made sure the innerBrowRaiser layer was set to 1 and was recording.  The innerBrowRaiser was the first facial shape I created.  I sculpted the face and pulled the inner brow area and the mid area between the left and right brows upwards. 

ZBrush InnerBrowRaiser Blendshape

For the outBrowRaiser, I pulled the outer brow area upwards and then smoothed it out a bit so that it was not changing the shape of the head.  

ZBrush Outer Brow Raiser Blendshape

I then checked both blendshapes together to see how they look when used at the same time.  I tweaked both blendshapes in some spots to make them blend better with each other.

ZBrush Inner and Outer Brow Raisers Used Together

For the Brow Lowerer, I brought in the eyebrows and tried to create a wrinkle.  I also moved them down a little bit and tested it with my inner brow raiser.  This is a shape I think I could improve.

ZBrush Brow Lowerer Blendshape

For the negative inner brow raiser I focused on the shape of the eyebrows and brought them down towards the eyes.  I made mine very exaggerated.

ZBrush Negative Inner Brow Raiser Blendshape

The negative outer brow raiser is more subtle.  I sculpted it and then checked it with the negative inner brow raiser and then went back in and adjusted.

ZBrush Negative Outer Brow Raiser Blendshape

For the sad blendshape, I took the inner brow raiser, brow lowerer, and the negative brow raiser and duplicated those shapes.  I then merged the duplicates into the sad blendshape.  From here I made some tweaks to improve the shape of the brows.  

ZBrush Sad Blendshape

For the angry blendshape, I duplicated the brow lowerer and the negative inner brow raiser and then merged them.  When combining these two blendshapes at their max, the face did break so I smoothed and tweaked the geometry to create the angry look.  

ZBrush Angry Blendshape

Once I got my brow shapes, I began to create my mouth shapes.  The first one I worked on was the lip stretcher.  When I think about it's movement, I see it moving horizontally.  To start my process I created a new layer and unfroze the jaw mask.  I sculpted the horizontal movement but also made sure I added a little movement going inwards with the shape of the head.  I also added the small details of the nose slightly flaring and the lips getting thinner as they stretch.  

ZBrush Lip Stretcher Blendshape

The lip tightener is the opposite of the lip stretcher since I am bringing the lips inwards instead of outwards.  With the Pink Haired Girl I have to think about the fact that by design, she already has a smaller compressed mouth.  When making the blendshape, I also gave more volume to the lips and made the nose also slightly move. 

ZBrush Lip Tightener Blendshape

The lip corner puller is a bit strange on this character because her design is frowny.  This shape was the hardest for me to get correct because she did look creepy.  I manipulated the corners of her mouth as well as inflated her cheeks.  I also moved her mouth up and had her nose flare slightly.  Because her cheeks inflate I had to smooth the geometry around her eyelids and cheeks.  

ZBrush Lip Corner Puller Blendshape

Because my character is already frowning, I did not go too crazy with the lip corner depressor.  I pulled the corners of the lips downwards and then pulled the skin around the cheeks downwards to follow.  I also moved the nose a litttle bit and moved the lips downwards.  For the top lip I moved it downwards and the bottom lip I moved slightly upwards.  This is a blendshape I think I could improve some more.  

ZBrush Lip Corner Depressor Blendshape

After getting my mouth shapes I began to work on my lip shapes.  The first one I sculpted was the upper lip depressor.  I pulled the lips up towards the corners and pulled the skin back so that it moves.  I did adjust the middle of the lip so that it does not move with the corners.  A separate blendshape will be used to create that.  I also tried to make sure that I don't move the nose too much.  

ZBrush Upper Lip Raiser Blendshape

Since I created the upper lip raiser, I then worked on the upper lip raiser middle blendshape.  To make the middle shape, I left the upper lip raiser blendshape turned on and on it's own layer I moved the middle part of the lip upwards so that it created a more square shape with the corners.  This is used for making the face look angry.

ZBrush Upper Lip Raiser Middle Blendshape

For the nose wrinkler blendshape, I left the upper lip raiser and the upper lip raiser middle blendshape turned on.  On it's own separate layer I sculpted the shape. I mostly pulled the corners of the nose upwards and then created a wrinkle with the geometry right behind the nostrils.  I also moved the nose slightly upwards.  

ZBrush Nose Wrinkler Blendshape

Since the lower lip depressor works with the lower lip and not the upper lip or head, I unfroze the jaw area and then froze the head so that it would not move.  I made this blendshape a bit extreme.  I mostly pulled down the lips on the side and smoothed out the geometry.  I moved some of the geometry under the lips to give some movement.  I also very slightly moved the middle of the lower lip.  

ZBrush Lower Lip Depressor Blendshape

Similarly how I worked on the lower lip depressor, on it's own layer I unfroze the jaw geometry and then froze the head geometry for the middle lower lip depressor.  I left the lower lip depressor turned on so I can properly blend the two lip depressors together.  I moved the middle of the lip downwards and tried not to flatten the middle of the lip too much.  I also adjusted the lip depressor blendshape after I got the middle lip depressor where I wanted it to be.  

ZBrush Middle Lower Lip Depressor Blendshape

For these next two blendshapes I worked with the cheek area.  For the cheek puff I pulled the cheeks outwards.  I adjusted the masks around the characters eyes and jaw so I could move the geometry in those areas slightly.  For this blendshape I had to be careful about moving the eyelids, nose and mouth too much.  After doing some research I found a video from FlippedNormals on Youtube about Erasing from Layers in ZBrush.  Using the technique shown in the video I was able to adjust the geometry around the mouth, nose and eyelids after creating the cheek puff shape so it is less influenced.  I smoothed out the geometry after erasing on the layers so it looks more blended. 

ZBrush Cheek Puff Blendshape


The last blendshape I created was the cheek suck blendshape.  I went closer to the lips and brought the cheek geometry inwards.  I then adjusted the jaw mask a little bit to move the geometry in that area.  I also tried to make sure that there looked like there was a cheek bone.  Using the erasing from layers in zbrush technique I made sure that the lips where untouched by the geometry being moved around.  To get some extra tweaking on this blendshape I turned on the lip tightener blendshape and moved the geometry around the lips to better blend those two blendshapes.  

ZBrush Cheek Suck Blendshape

After I created all my blendshapes, I brought them into maya using the FBX exported in zbrush.  Once I brought the blendshapes in I tested them out on my rigging head to see how they were working.  Overall this had been my first real experience creating blendshapes for a facial rig.  I really enjoyed this process and it does takes a lot of time.  There is so much more for me to learn about blendshapes and with more practice the blendshapes will only improve!

Scaling Your Controllers when they are Connected

 Sometimes when you are working on a rig, you may need to go back and adjust your controllers size a little bit.  This is possible without b...