It's been a while since I have worked on this project. Sometimes life gets a bit crazy and this is a project I am picking back up. When I was creating my joints for my jaw pivot, I learned something I didn't really think about too much. I think about anatomy a lot when I work on a character by looking at several real life skeletons and looking at animation. With the jaw pivot, the whole idea of where it can be placed to get different effects really got me thinking.
When I placed my joints, I placed it based on realism. I placed my jaw hinge joint close to the ear and close to where the neck would be connecting to the skull. It's very similar to a drawing my instructor did in class.
Autodesk Maya 2022 Joint Placement
Drawing from Facial Rigging Class
A really interesting point about the jaw hinge that I learned is that they don't always just rotate. They will also translate a little bit when it gets to a certain point. For more realistic rigs, you can leave rotation and translation turned on so that it is easier for the animators. Animators can adapt it a little bit. I also learned that with realistic facial rigs you can create the jaw open with shapes and the motion would be build in.
Cartoon rigs are different from realistic rigs because the design of the character will become a consideration on how you want them to move. They may have a very long nose like Goofy or very long fingers. This same idea applies to the jaw. Where you place your jaw hinge will give you a different effect for how the jaw moves. An example I looked at was if you wanted your jaw to move almost vertically, your pivot would have to very far away so that when you rotate it would move more vertical.
Example of Jaw Hinge for Vertical Movement
Another example that was looked at is if the character was designed to have a very sharp rotation. The pivot point would actually move further way from the ear and closer to the jaw.
Example of Jaw Hinge for Sharp Rotation
A cool trick that I tried for visualizing how the pivot is going to act is to bring a cylinder into the scene and then rotate it 90 so that it's on it's side. You would be looking at the vertices that create the center of the cylinder. Then bringing it up into the head geometry and turning on xray. You can use the center, scale and place it where you think you want to put your jaw hinge joint. Tip: The more subdivisions you have the smoother it looks. Then rotate the cylinder, this will give you an idea as to what kind of effect you will get.
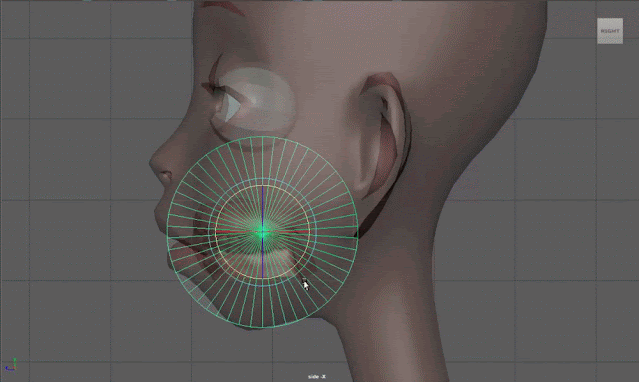
Gif Example of Sharp Rotation
While I haven't had the experience of creating a rig with a vertical movement or a sharp rotation, I found this to be very interesting and hope I can create a rig with these effects in the future!