Showing posts with label PinkHairedGirlFacialRigProject. Show all posts

Friday, December 1, 2023

Scaling Your Controllers when they are Connected

 Sometimes when you are working on a rig, you may need to go back and adjust your controllers size a little bit.  This is possible without breaking them but you cannot simply just go in and scale them as this would cause the controller to break and it can make your character or asset manipulate when you try to scale which is not what you want.  

To start off, one important method you need to know about is going into component mode.  This will allow us to scale our controllers without breaking them or having them manipulate our asset/character.  This method also won't put a scale value on our controller.  If you don't know where component mode is, it is always towards the top right under the windows tab.  It's icon looks like this .  Once in component mode, you need to select all of the vertices and then you can scale and adjust the controller as much as you like without breaking it's functionality.  

Component Mode Example

Another important setting you need to remember is object and world space.  This can affect your controller if you try to scale it and on the wrong setting.  It can cause your pivot to move especially if you are grabbing multiple controllers.  To make sure you are on the right setting, you can double click on your scaling tool and make sure that the Scale Center is at Object. 

Scaling Tool Settings

Now there is another way to actually open these settings if you are someone who likes to know how to open settings and windows multiple ways.  The second way to open this window is to push the Toggle Tool Settings Icon.  This icon is located in the top right corner of your maya window under Workspace.  It looks a little bit like a hammer.  When you click on this icon, you need to be using scale.  It will open the scale settings then.  If you are on rotate or translate it will open those settings.  You can switch to scale while the window is open and it will update.  

Toggle Tools Settings


Monday, January 31, 2022

Jaw Pivot - Good Way To Figure Out Where This Joint Should Be and The Effects You Get

 It's been a while since I have worked on this project.  Sometimes life gets a bit crazy and this is a project I am picking back up. When I was creating my joints for my jaw pivot, I learned something I didn't really think about too much.  I think about anatomy a lot when I work on a character by looking at several real life skeletons and looking at animation.  With the jaw pivot, the whole idea of where it can be placed to get different effects really got me thinking.  

When I placed my joints, I placed it based on realism.   I placed my jaw hinge joint close to the ear and close to where the neck would be connecting to the skull.  It's very similar to a drawing my instructor did in class.

Autodesk Maya 2022 Joint Placement

Drawing from Facial Rigging Class

A really interesting point about the jaw hinge that I learned is that they don't always just rotate.  They will also translate a little bit when it gets to a certain point.  For more realistic rigs, you can leave rotation and translation turned on so that it is easier for the animators.  Animators can adapt it a little bit.  I also learned that with realistic facial rigs you can create the jaw open with shapes and the motion would be build in.  

Cartoon rigs are different from realistic rigs because the design of the character will become a consideration on how you want them to move.  They may have a very long nose like Goofy or very long fingers.  This same idea applies to the jaw.  Where you place your jaw hinge will give you a different effect for how the jaw moves.  An example I looked at was if you wanted your jaw to move almost vertically, your pivot would have to very far away so that when you rotate it would move more vertical.  

Example of Jaw Hinge for Vertical Movement

Another example that was looked at is if the character was designed to have a very sharp rotation.  The pivot point would actually move further way from the ear and closer to the jaw.

Example of Jaw Hinge for Sharp Rotation

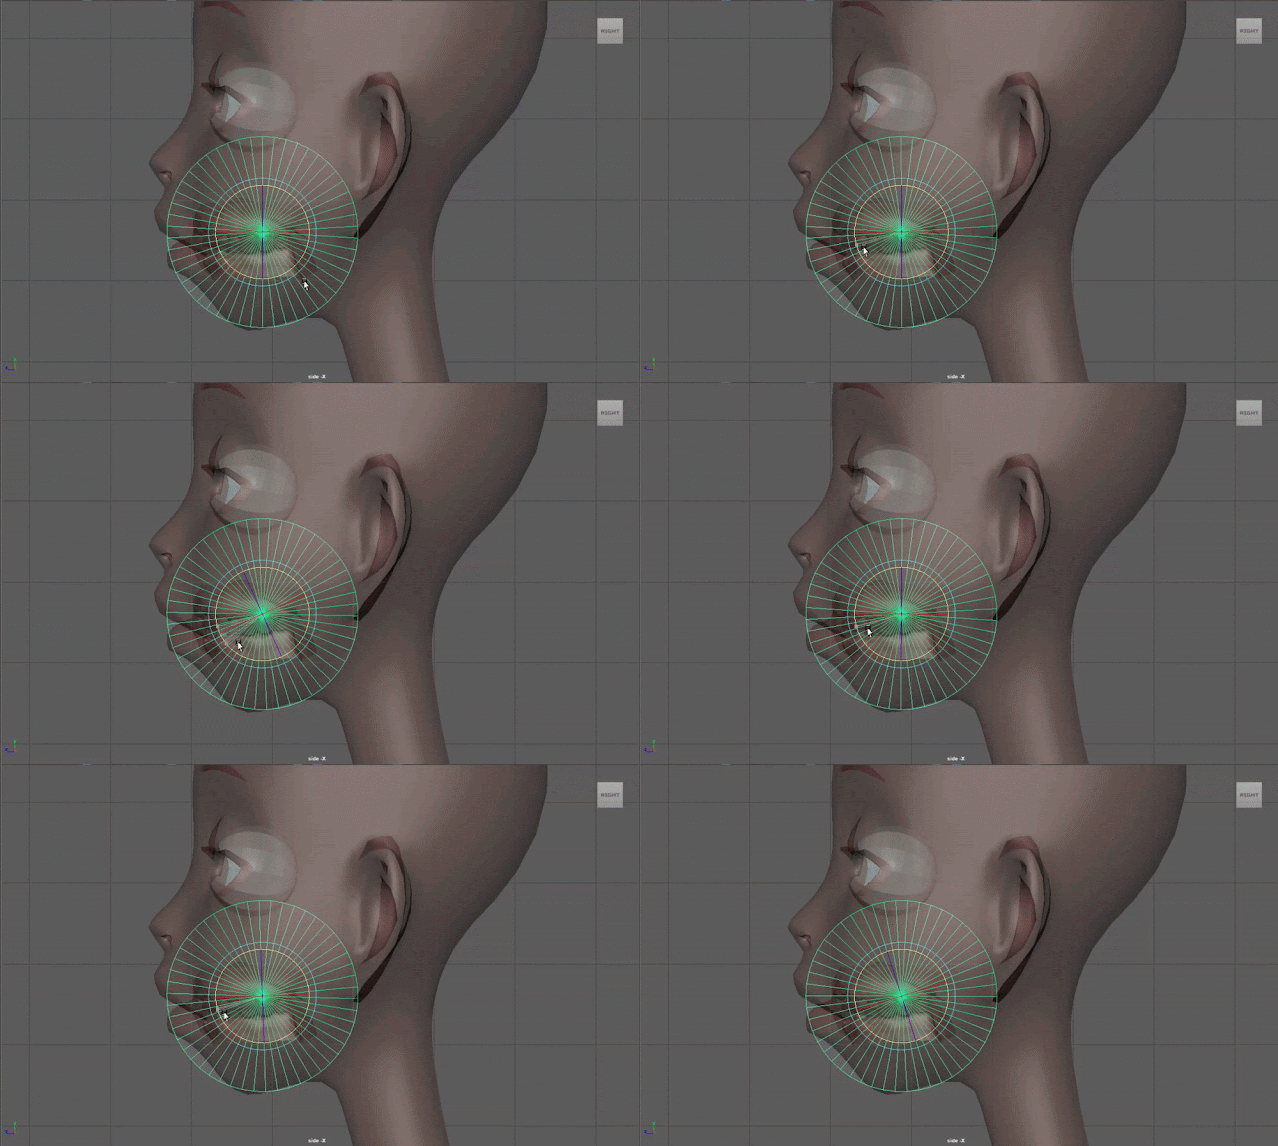
A cool trick that I tried for visualizing how the pivot is going to act is to bring a cylinder into the scene and then rotate it 90 so that it's on it's side.  You would be looking at the vertices that create the center of the cylinder.  Then bringing it up into the head geometry and turning on xray.  You can use the center, scale and place it where you think you want to put your jaw hinge joint.  Tip:  The more subdivisions you have the smoother it looks.  Then rotate the cylinder, this will give you an idea as to what kind of effect you will get. 

Gif Example of Sharp Rotation

While I haven't had the experience of creating a rig with a vertical movement or a sharp rotation, I found this to be very interesting and hope I can create a rig with these effects in the future!

Saturday, November 27, 2021

Rigging the Pink Haired Girls Face Part 2

 This week my goal is to create some blend shapes for my facial rig.  I will be using ZBrush to create all my shapes and then export them back into Maya.  

Maya 2022 Completed Blendshapes

Maya 2022 Gif of Head with Blendshapes

To start off this week I need to export my model into ZBrush.  I went back to my original file with my typology I used for my rig to make it easier to work with rather than going into my rigged file.  I will be exporting the basic model without the hair.  This includes the eyes, and teeth.

Maya 2022 With My Original Typology

To start my process of exporting my model to ZBrush, I cleaned up my scene a little to make it easier.  I combined the two eyes together and then combined the upper and lower teeth together.  

Maya 2022 Combined Geometry

For this next part I exported the eyes and the teeth separately as an obj.  I used the default settings for both of these exports.  Before I actually export my model I created some masking on certain areas on the face to help my workflow when I'm in ZBrush.  Doing this allows me to manipulate the face but not move areas I don't want to move. I selected the edge in the eyelids and then clicked to faces.  I then increased my selection and added a new material to the the selection.  I colored it blue so it's easier for me to differentiate my selections.

Maya 2022 Eyelid Mask

I then followed the same steps and created a mask for my lower lip/jaw.

Maya 2022 Jaw Mask

For importing my head into ZBrush I made sure that in my Preferences under Import I had the Import Mat As Groups selected. I created a Polymesh 3D and then imported the head.  For the eyes and teeth I appended a 3D star shape and then imported each of them.

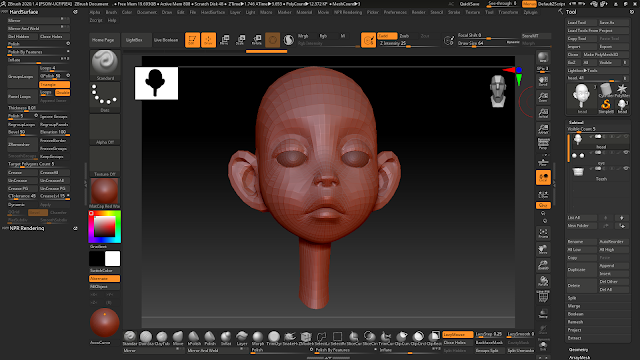
ZBrush with Head Model

I then went into Edit Mode and pushed Shift + F to draw polyfill.  From my class I learned about the power of ctrl + shift + select for selecting parts of the face to isolate.  I then used ctrl to paint over them to create a mask.  To make working on the face easier I went up to Transform and turned on Symmetry.  I also created some layers to make exporting easier and so I can have many expressions in one file.  For the brush I'm using, I'm using the Move brush.

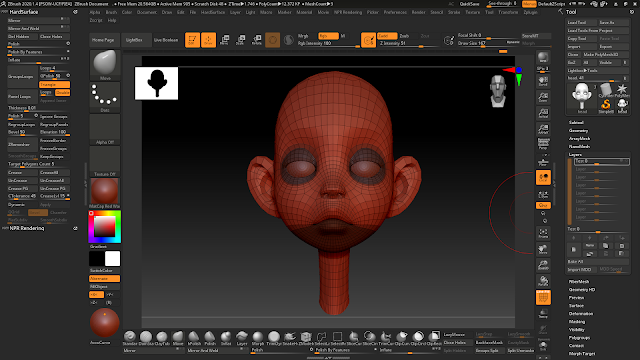
ZBrush File Set Up

Using the layers I set up, I made sure the innerBrowRaiser layer was set to 1 and was recording.  The innerBrowRaiser was the first facial shape I created.  I sculpted the face and pulled the inner brow area and the mid area between the left and right brows upwards. 

ZBrush InnerBrowRaiser Blendshape

For the outBrowRaiser, I pulled the outer brow area upwards and then smoothed it out a bit so that it was not changing the shape of the head.  

ZBrush Outer Brow Raiser Blendshape

I then checked both blendshapes together to see how they look when used at the same time.  I tweaked both blendshapes in some spots to make them blend better with each other.

ZBrush Inner and Outer Brow Raisers Used Together

For the Brow Lowerer, I brought in the eyebrows and tried to create a wrinkle.  I also moved them down a little bit and tested it with my inner brow raiser.  This is a shape I think I could improve.

ZBrush Brow Lowerer Blendshape

For the negative inner brow raiser I focused on the shape of the eyebrows and brought them down towards the eyes.  I made mine very exaggerated.

ZBrush Negative Inner Brow Raiser Blendshape

The negative outer brow raiser is more subtle.  I sculpted it and then checked it with the negative inner brow raiser and then went back in and adjusted.

ZBrush Negative Outer Brow Raiser Blendshape

For the sad blendshape, I took the inner brow raiser, brow lowerer, and the negative brow raiser and duplicated those shapes.  I then merged the duplicates into the sad blendshape.  From here I made some tweaks to improve the shape of the brows.  

ZBrush Sad Blendshape

For the angry blendshape, I duplicated the brow lowerer and the negative inner brow raiser and then merged them.  When combining these two blendshapes at their max, the face did break so I smoothed and tweaked the geometry to create the angry look.  

ZBrush Angry Blendshape

Once I got my brow shapes, I began to create my mouth shapes.  The first one I worked on was the lip stretcher.  When I think about it's movement, I see it moving horizontally.  To start my process I created a new layer and unfroze the jaw mask.  I sculpted the horizontal movement but also made sure I added a little movement going inwards with the shape of the head.  I also added the small details of the nose slightly flaring and the lips getting thinner as they stretch.  

ZBrush Lip Stretcher Blendshape

The lip tightener is the opposite of the lip stretcher since I am bringing the lips inwards instead of outwards.  With the Pink Haired Girl I have to think about the fact that by design, she already has a smaller compressed mouth.  When making the blendshape, I also gave more volume to the lips and made the nose also slightly move. 

ZBrush Lip Tightener Blendshape

The lip corner puller is a bit strange on this character because her design is frowny.  This shape was the hardest for me to get correct because she did look creepy.  I manipulated the corners of her mouth as well as inflated her cheeks.  I also moved her mouth up and had her nose flare slightly.  Because her cheeks inflate I had to smooth the geometry around her eyelids and cheeks.  

ZBrush Lip Corner Puller Blendshape

Because my character is already frowning, I did not go too crazy with the lip corner depressor.  I pulled the corners of the lips downwards and then pulled the skin around the cheeks downwards to follow.  I also moved the nose a litttle bit and moved the lips downwards.  For the top lip I moved it downwards and the bottom lip I moved slightly upwards.  This is a blendshape I think I could improve some more.  

ZBrush Lip Corner Depressor Blendshape

After getting my mouth shapes I began to work on my lip shapes.  The first one I sculpted was the upper lip depressor.  I pulled the lips up towards the corners and pulled the skin back so that it moves.  I did adjust the middle of the lip so that it does not move with the corners.  A separate blendshape will be used to create that.  I also tried to make sure that I don't move the nose too much.  

ZBrush Upper Lip Raiser Blendshape

Since I created the upper lip raiser, I then worked on the upper lip raiser middle blendshape.  To make the middle shape, I left the upper lip raiser blendshape turned on and on it's own layer I moved the middle part of the lip upwards so that it created a more square shape with the corners.  This is used for making the face look angry.

ZBrush Upper Lip Raiser Middle Blendshape

For the nose wrinkler blendshape, I left the upper lip raiser and the upper lip raiser middle blendshape turned on.  On it's own separate layer I sculpted the shape. I mostly pulled the corners of the nose upwards and then created a wrinkle with the geometry right behind the nostrils.  I also moved the nose slightly upwards.  

ZBrush Nose Wrinkler Blendshape

Since the lower lip depressor works with the lower lip and not the upper lip or head, I unfroze the jaw area and then froze the head so that it would not move.  I made this blendshape a bit extreme.  I mostly pulled down the lips on the side and smoothed out the geometry.  I moved some of the geometry under the lips to give some movement.  I also very slightly moved the middle of the lower lip.  

ZBrush Lower Lip Depressor Blendshape

Similarly how I worked on the lower lip depressor, on it's own layer I unfroze the jaw geometry and then froze the head geometry for the middle lower lip depressor.  I left the lower lip depressor turned on so I can properly blend the two lip depressors together.  I moved the middle of the lip downwards and tried not to flatten the middle of the lip too much.  I also adjusted the lip depressor blendshape after I got the middle lip depressor where I wanted it to be.  

ZBrush Middle Lower Lip Depressor Blendshape

For these next two blendshapes I worked with the cheek area.  For the cheek puff I pulled the cheeks outwards.  I adjusted the masks around the characters eyes and jaw so I could move the geometry in those areas slightly.  For this blendshape I had to be careful about moving the eyelids, nose and mouth too much.  After doing some research I found a video from FlippedNormals on Youtube about Erasing from Layers in ZBrush.  Using the technique shown in the video I was able to adjust the geometry around the mouth, nose and eyelids after creating the cheek puff shape so it is less influenced.  I smoothed out the geometry after erasing on the layers so it looks more blended. 

ZBrush Cheek Puff Blendshape


The last blendshape I created was the cheek suck blendshape.  I went closer to the lips and brought the cheek geometry inwards.  I then adjusted the jaw mask a little bit to move the geometry in that area.  I also tried to make sure that there looked like there was a cheek bone.  Using the erasing from layers in zbrush technique I made sure that the lips where untouched by the geometry being moved around.  To get some extra tweaking on this blendshape I turned on the lip tightener blendshape and moved the geometry around the lips to better blend those two blendshapes.  

ZBrush Cheek Suck Blendshape

After I created all my blendshapes, I brought them into maya using the FBX exported in zbrush.  Once I brought the blendshapes in I tested them out on my rigging head to see how they were working.  Overall this had been my first real experience creating blendshapes for a facial rig.  I really enjoyed this process and it does takes a lot of time.  There is so much more for me to learn about blendshapes and with more practice the blendshapes will only improve!

Thursday, November 4, 2021

Troubleshoots for Having Your Blendshapes from ZBrush work on a Hero Head in Maya

 This week while working on my facial rig for the pink haired girl, I ran into an interesting problem.  When importing my blendshapes for my rig I found that the blendshapes imported in pieces when exported as an obj.  This completely breaks my blendshapes when I hook them up to my hero head.  I tried a couple of ways to fix this problem and I'm going to talk about all of them.

To describe the problem I had,  when I originally brought in the blendshapes they were multiple groups.  When I selected the faces to check the the flow of the typology I also found that it was chopped up into pieces.  

Maya 2022 Checking the Edge Flow on Blendshape

When I tried to attach the blendshape to the head and manipulated it, Half of the head cripples.

Maya 2022 Crippled Blendshape


After doing some research I found three ways to fix this for exporting from Zbrush, if that doesn't work then there are a few things to check in maya. 

The first setting I would check is your export settings.  Turning off group and turning on Qud, Txr, and Mrg.

ZBrush Export Settings

Besides looking in your tools, you can actually look for solutions in the Zplugin tab.  Exporting your blendshapes as an FBX also fixes the problem.  

ZBrush FBX Import/Export

Another cool way to export is to use the blendshape exporter Zbrush has built in.  It is also in the ZPlugin.  It saves a lot of time since it does export all the blendshapes and then opens them all in a maya scene.  I have found that it looks like it works.  Always make sure on your actual rigging head that it is actually working.  

ZBrush Blendshapes Export

Another setting I have heard of but haven't looked into is the Polygroups setting in your tools if these options do not work.  
For connecting your blendshapes to the head in Maya if exporting is not the issue is to check:
  • Frozen Transformations
  • Deleted History
  • Check to make sure your heads are the same because blendshapes move based on vertices points.  If the verticie points do not match up it will break the blendshapes.  

Saturday, October 23, 2021

Rigging the Pink Haired Girls Face Part 1

 For this week I worked on getting the base/main part of my facial rig.  I created the jaw pivot, skeleton layout, control layout and a first skinning pass. 

Gif of Maya 2022 First Facial Rig Pass

Before I started rigging, in the class we make a plan on how we are going to rig the face. The first part of the plan was a create the skeleton and the controls.  The skeleton would be for the neck, head, ears, nose, nostrils, upper and lower gum and the tongue.  Once we get the joints in, then the controllers are built.  The model shapes are then looked at, especially for the eyebrows on the model I used. Model shapes will be used on the mouth and lips too.  After modeling the shapes, I'm going to use Zbrush to connect my shapes and then bring it over to Maya and work with symmetry.  Controls will be used for the shapes.  I also will be building an extra mouth control set up that will move the whole mouth around. 

For the eye set up,  there will be an eye look rig.  The eyelids will also have their own rig and a fall off for when you move the eyes.  Another lip and eyebrow rig setup will be created.  I'm also going to explore some extra deformation with deformers and then I'm going to test the rig.  Through out the process of creating this rig some animators will be looking at it and seeing if they can break it and where I can improve.  

To start the process of actually rigging, I wanted to get the jaw pivot correct.  I had a little bit of difficulty with this on the first facial rig I created.  I learned about a strategy to help determine where to put the jaw pivot joint which is to put a cylinder in the face and then rotate it to get an idea on how it will move.  I placed my cylinder around the ear. 

Maya 2022 Cylinder Used to Determine The Location of The Jaw Pivot

Once I got the placement of the cylinder I created a locator and used a parent constraint with maintain offset turned off to put it in the exact location the cylinder is.  I then deleted the constraint and hid the cylinder.  I made the local scale bigger to see the locator better and then rotated it towards the edge of the lip for jaw reference.  

Maya 2022 Jaw Locator Pivot Reference

My next big step in this process is to get the joint placement for my skeleton.  To start this I am going to create some locators that the joints will snap and orient to.  I duplicated the jaw pivot locator and moved it to the edge of the lip.  I also placed the left eye locators with a small mel script.  To keep my scene organized I created two layers, one for the locators and another for the geometry.  

Maya 2022 Creating Layers and Joint Locators

I then began to create the skeleton.  I first placed the joints in the neck and the head.  After some adjustments to the placement I created a naming convention and then began to create the joints on the jaw and the left eye.  I snapped the joints to the locators and then connected them to the head. 
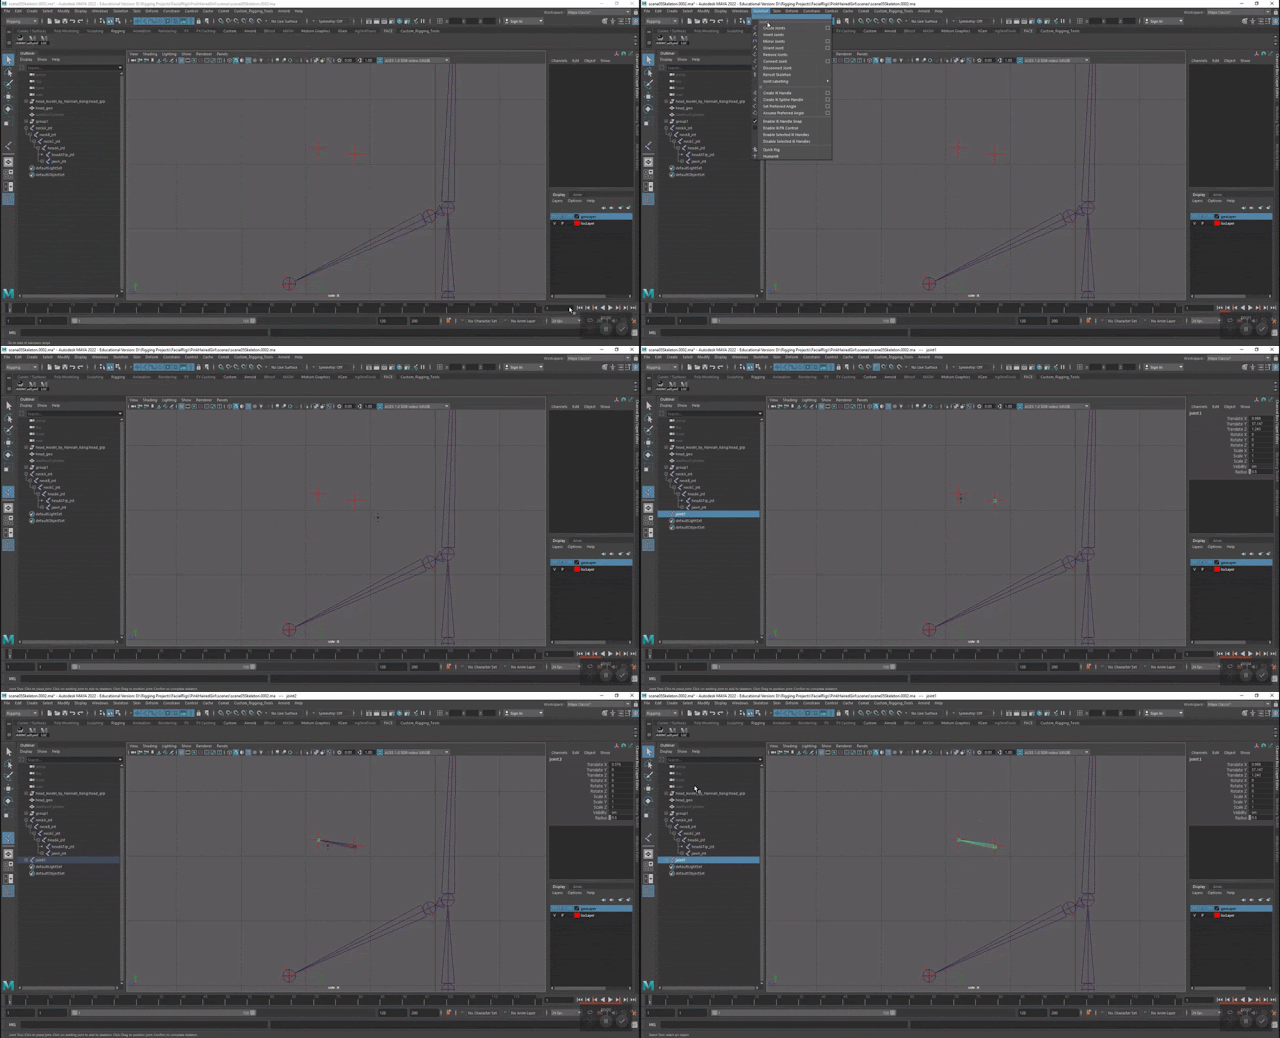
Gif of Maya 2022 Snapping joints to the locators

Maya 2022 Jaw and Eye Joints Connected to Head Skeleton

I then began to place the nose and left ear joints.  After adjusting them I connected them to the head skeleton.

Maya 2022 Nose and Left Ear Connected to Head Skeleton

After getting my skeleton placed, I checked the orientation of the joints and fixed the ones that were pointing in the wrong direction.  I also did a rotation test on the head and neck to make sure that it was moving correcting when rotating together.

Maya 2022 Orienting Joints

I then worked on mirroring the joints.  For most of them I mirrored with the behavior setting so that the joints act as if they are mirrored.  For the eyes I mirrored them with the behavior setting and then fixed their orientation so that they act as if I mirrored with the orientation setting.

Maya 2022 Mirroring Joints

One of my favorite parts of rigging is creating the controllers.  I created the main, secondary main, and neck controllers.  I used my own controller generator tool that I scripted in Python and the Comet tool to quickly create some simple controllers and put some colors on them. 

Maya 2022 Neck Controllers

Once I got my neck controllers, I created the head, jaw, nose, tip of nose, and ear controllers.  I like to color code my controllers.  Middle controllers are green and yellow while controllers on the left side of the face are blue and variations of blue.  On the right the colors are red and variations of red.

Maya 2022 Head, Jaw, Nose, Tip of Nose, and Ear Controllers

I next got some of my smaller controllers in which are for the nostrils, tongue and teeth.  Once I placed the controllers  I parented them under their respectful parents to make them follow the correct controllers when opening and closing the mouth.  With that I have all the main controllers created with the exception of creating my eye controllers.
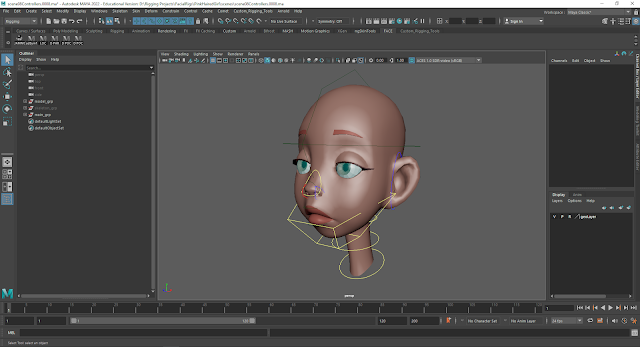
Maya 2022 Main Controllers

At this point I add my constraints to my controllers and clean up their channel box attributes.  I used parent and scale constraints.

Maya 2022 Gif of Controllers Moving Joints

Now that I got my joints connected to my controllers, I'm beginning my first pass at skinning.  I hid the everything except the head geometry so I could focus on just the head.  I then animated the controllers so that while I'm skinning I can see how it looks.

Maya 2022 Gif of Animated Controllers for Skinning

I then skinned the mesh to the joints I selected.  I also at this point went back and fixed a joint in the neck that I thought needed to be improved. Once I played back my animation I saw how the mesh was moving.  There is a lot of work ahead to make this skinning look good!

Maya 2022 Gif of Default Skinning

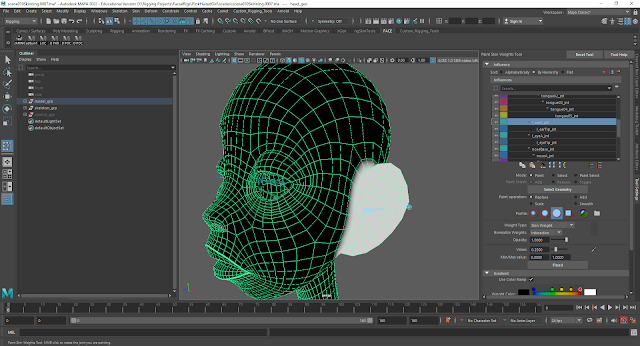
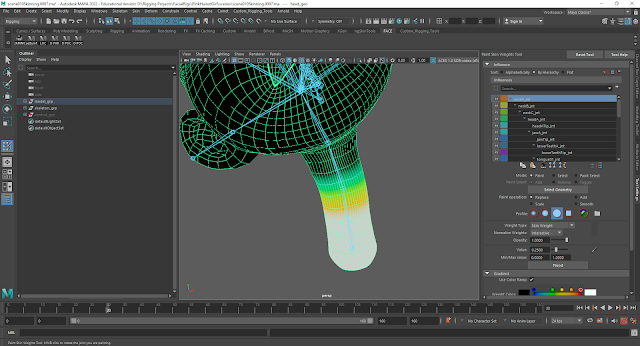
For my process of skinning, I started it off by blocking in the weights.  My first step for fixing the skinning was to use the paint skin weights tool and destroy the default skinning by flooding the skin weights on the first neck joint.  The whole head is set to one on the first neck joint (whole head is white).  Then I selected the edges that will be effected by my second neck joint and then pushed to vertices so that I had the vertices selected.  Going back into the paint skin weights tool I then selected the second neck joint and pushed flood. In the area that I had the vertices selected, the skin weights moved to the second neck joint. 

Maya 2022 Moving Skin Weights to Other Joints

I repeated the same steps to skin the head.  I took all the vertices that weren't skinned to the neck and skinned them to the head.  I then manually skinned some vertices to the third neck joint.  

Maya 2022 Manual Skinning on Neck Joint 3

For the jaw I selected an edge that was in the middle of the lips and then pushed to vertices.  I then used shift + . to increase my selection.  From here I flooded my selected vertices to the jaw joint and tested it in the animation.  It looks better but will need some blending and smoothing.  I manually added some more influence  to the jaw and then mirrored it

Maya 2022 Jaw Skinning Animation Test

For the ears I manually painted the weights on and tested it in the animation.  I then mirrored it for the other ear.  

Maya 2022 Left Ear Skinning

I did the same thing for the nose, nose tip, and the nostrils.  I then mirrored and tested the animation.  After seeing the animation I went back in and improved the nostril skinning.  

Maya 2022 Gif of Nose Animation Skinning Test

I worked on the neck a little bit to smooth it out.  I manually painted edge loops between neck joint one and neck joint to blend them.  

Maya 2022 Blending The Neck Joints


I began to smooth out my skin after blocking in the skin weights.  I worked on the jaw first and used NgSkin tools to smooth out the skinning.

Maya 2022 Smooth Skin For Jaw

I also worked on the skinning by the ears and the cheeks to move a little bit when the jaw opens.  The skinning under the jaw as it opens wide also got smoothed out a bit but I will be adding correctives to make it look better when opening the mouth wide. 

Maya 2022 Smooth Skinning on Cheeks and Under Jaw

Continuing to work on the skinning,  I smoothed out the neck, ears, nose, nose tip, and nostrils.  These followed the same process of using NgSkin tools and skinning manually.  Also referring back to the animation and mirroring the weights.  

Gif of Maya 2022 Smoothed Facial Skin Weights

Once I smoothed out the skinning on my head, I just have the eyes, teeth, and tongue left. 

Maya 2022 Eyes and Teeth

For the eyes and the teeth I simply parent and scale constrained them.  It's a little bit faster than skinning them so that is what I did for now.  The tongue I did skin to the tongue joints and then did some smoothing.

Maya 2022 Tongue Skinning

From here I unhid all of the geometry to see all parts of the face stating to come to life!

Gif of Maya 2022 Skinned Face and Joints

Scaling Your Controllers when they are Connected

 Sometimes when you are working on a rig, you may need to go back and adjust your controllers size a little bit.  This is possible without b...