Sunday, October 24, 2021

Renderman Buckets in Maya

 I learned about Renderman in my undergrad when working on Delivery.  It has become one of my favorite renderers to use in Maya because of how it works but also because it's what Pixar uses to render their films.  I'm very inspired by Pixar.  In this post I just wanted to talk about buckets.  You often see buckets when you are rendering an animation and it takes a long time.  They have a big impact on how quickly and the order of where the scene will start to render.  In this post I'm going to talk about how to change the bucket size and how to change the bucket order.  

How to change bucket size:  First you need to know that the bucket size effects the blue boxes on the IPR if you have them visible.

The first step to changing your bucket size is to open your Renderman Settings, this could also be your rendering settings.  In the popup click on the Renderman tab next to the Common Tab.

Maya 2022 Render Settings Renderman Tab

In the Advanced tab in the Render Options tab you will find Bucket Size. Click the down arrow to select a size.  The reason you want to change the size is because for certain outputs it makes a difference.  It takes longer for a scene that is large with a small bucket size to render.  Changing this also has an effect on Batch Renders and Final Renders.  

Maya 2022 Renderman Bucket Size

Since we understand how to change the bucket size when we need to,  how do we change the order?  Changing the order of your rendered scene does not effect your rendering, it's more so for your own preference.  

To start this, you need your Renderman settings open.  If you already have it open, then you're good.  Then in the popup just click Renderman next to the Common tab.  In the Render Options tab you will find Bucket Order.  Click the down arrow and select your preference.  

Maya 2022 Renderman Settings Bucket Order

Facial Action Coding Systems and Model Typology

From my facial rigging class, one of the concepts I learned is that it's very hard for humans to isolate the muscles in the face because of how they are so inner connected.  When you move one part of the face, other muscles on the face move and react too.

AU - Fundamental actions of individual Muscles or groups of muscles.

AU - Brows: These are just very basic

  • Inner Brow Raiser
  • Outer Brow Raiser
  • Brow Lowerer - This is the only action that brows do apart from inner and outer
AU - Lips
  • Upper Lip Raiser - Raises the upper lip corners
  • Lower Lip Depressor - lowers to lower lip corners
  • Nose Wrinkler - compliments upper lip raiser expressions.. It moves the corner of the nose and creates a deepening in the nasal fold.  
AU - Mouth
  • Lip Corner Puller - Basically is a smile
  • Lip Corner Depressor - Frown or Sad
  • Lip Tightener
  • Lip Stretcher

Facial Rigs are controlled through attributes or controllers.  The danger with attributes is that the animator will have to know what to reduce or increase to get the facial expressions they are looking for.  Controllers do a better job at fixing this problem where animators need to adjust many different attributes.  Having controllers may give you more control to follow the action units.  Both attributes and controls give you the action units you need.  


AU - Cheeks
  • Cheek Puff - Inflates
  • Cheek Suck 

Awesome Web Reference: Imotions


 Typology:

Typology on a model is key to get good results on both the shapes you create and the deformation.

Before you start rigging, you should always check the typology.  If you are modeling it or receiving it, it's always a good idea to check it. 

Things to look for in good typology:
  • Circular loops in the mouth and eyes
  • same number of edges on upper and lower lips and eyelids
  • Quads
    • Proportional and even
    • Good flow
    • Triangles if needed out of the way
    • star edges out of the way as much as you can
  • Vertical edges on eyebrows
  • Muzzle loop
  • Nasolabial Fold Line
Example from Google of Facial Typology


Good website for typology reference: Hippydrome

Saturday, October 23, 2021

Rigging the Pink Haired Girls Face Part 1

 For this week I worked on getting the base/main part of my facial rig.  I created the jaw pivot, skeleton layout, control layout and a first skinning pass. 

Gif of Maya 2022 First Facial Rig Pass

Before I started rigging, in the class we make a plan on how we are going to rig the face. The first part of the plan was a create the skeleton and the controls.  The skeleton would be for the neck, head, ears, nose, nostrils, upper and lower gum and the tongue.  Once we get the joints in, then the controllers are built.  The model shapes are then looked at, especially for the eyebrows on the model I used. Model shapes will be used on the mouth and lips too.  After modeling the shapes, I'm going to use Zbrush to connect my shapes and then bring it over to Maya and work with symmetry.  Controls will be used for the shapes.  I also will be building an extra mouth control set up that will move the whole mouth around. 

For the eye set up,  there will be an eye look rig.  The eyelids will also have their own rig and a fall off for when you move the eyes.  Another lip and eyebrow rig setup will be created.  I'm also going to explore some extra deformation with deformers and then I'm going to test the rig.  Through out the process of creating this rig some animators will be looking at it and seeing if they can break it and where I can improve.  

To start the process of actually rigging, I wanted to get the jaw pivot correct.  I had a little bit of difficulty with this on the first facial rig I created.  I learned about a strategy to help determine where to put the jaw pivot joint which is to put a cylinder in the face and then rotate it to get an idea on how it will move.  I placed my cylinder around the ear. 

Maya 2022 Cylinder Used to Determine The Location of The Jaw Pivot

Once I got the placement of the cylinder I created a locator and used a parent constraint with maintain offset turned off to put it in the exact location the cylinder is.  I then deleted the constraint and hid the cylinder.  I made the local scale bigger to see the locator better and then rotated it towards the edge of the lip for jaw reference.  

Maya 2022 Jaw Locator Pivot Reference

My next big step in this process is to get the joint placement for my skeleton.  To start this I am going to create some locators that the joints will snap and orient to.  I duplicated the jaw pivot locator and moved it to the edge of the lip.  I also placed the left eye locators with a small mel script.  To keep my scene organized I created two layers, one for the locators and another for the geometry.  

Maya 2022 Creating Layers and Joint Locators

I then began to create the skeleton.  I first placed the joints in the neck and the head.  After some adjustments to the placement I created a naming convention and then began to create the joints on the jaw and the left eye.  I snapped the joints to the locators and then connected them to the head. 
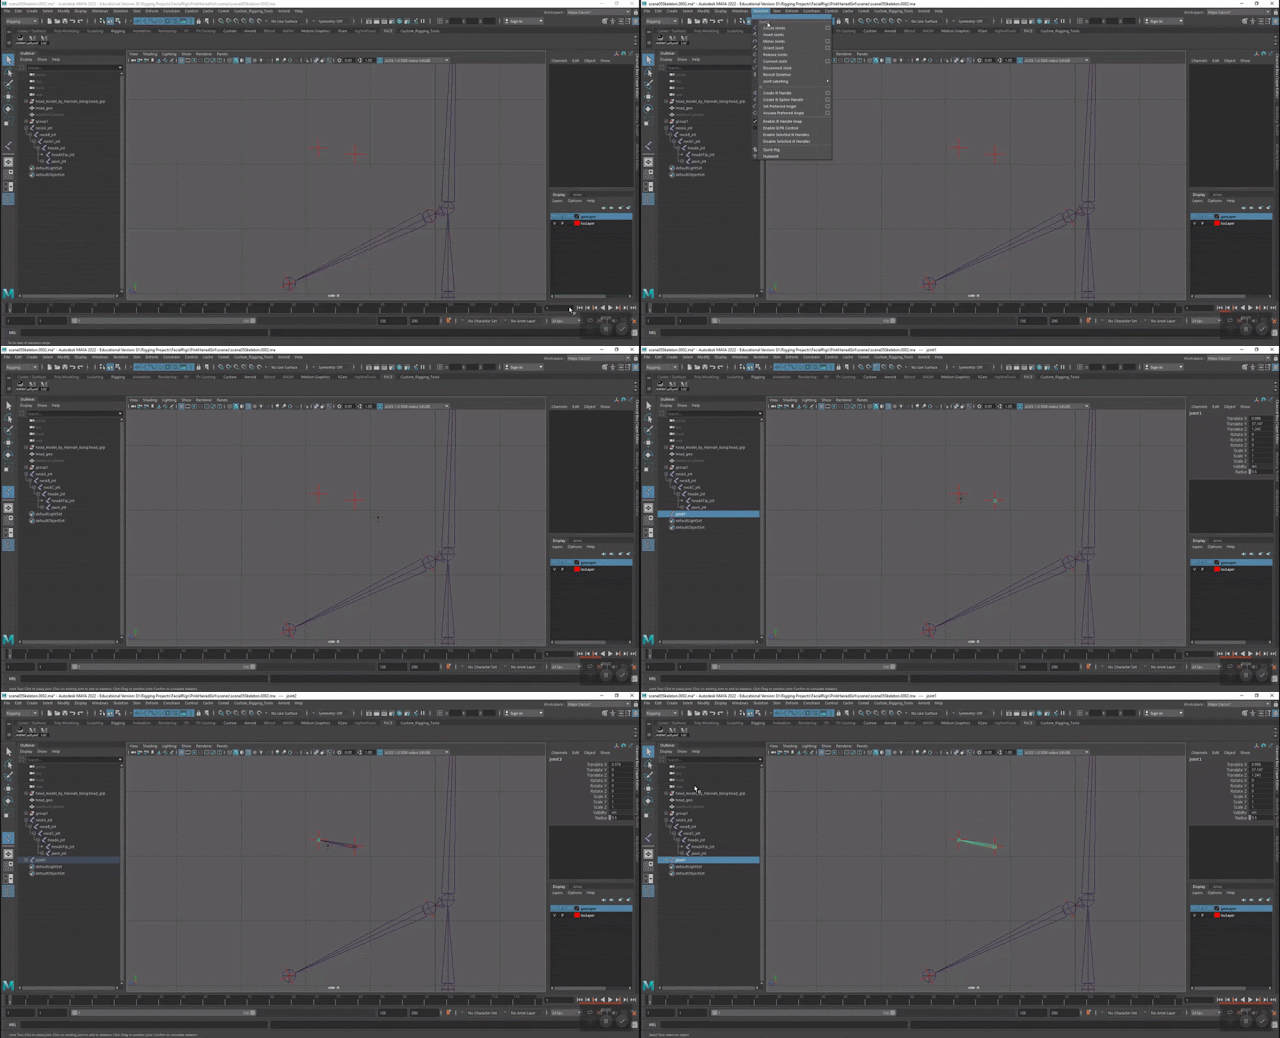
Gif of Maya 2022 Snapping joints to the locators

Maya 2022 Jaw and Eye Joints Connected to Head Skeleton

I then began to place the nose and left ear joints.  After adjusting them I connected them to the head skeleton.

Maya 2022 Nose and Left Ear Connected to Head Skeleton

After getting my skeleton placed, I checked the orientation of the joints and fixed the ones that were pointing in the wrong direction.  I also did a rotation test on the head and neck to make sure that it was moving correcting when rotating together.

Maya 2022 Orienting Joints

I then worked on mirroring the joints.  For most of them I mirrored with the behavior setting so that the joints act as if they are mirrored.  For the eyes I mirrored them with the behavior setting and then fixed their orientation so that they act as if I mirrored with the orientation setting.

Maya 2022 Mirroring Joints

One of my favorite parts of rigging is creating the controllers.  I created the main, secondary main, and neck controllers.  I used my own controller generator tool that I scripted in Python and the Comet tool to quickly create some simple controllers and put some colors on them. 

Maya 2022 Neck Controllers

Once I got my neck controllers, I created the head, jaw, nose, tip of nose, and ear controllers.  I like to color code my controllers.  Middle controllers are green and yellow while controllers on the left side of the face are blue and variations of blue.  On the right the colors are red and variations of red.

Maya 2022 Head, Jaw, Nose, Tip of Nose, and Ear Controllers

I next got some of my smaller controllers in which are for the nostrils, tongue and teeth.  Once I placed the controllers  I parented them under their respectful parents to make them follow the correct controllers when opening and closing the mouth.  With that I have all the main controllers created with the exception of creating my eye controllers.
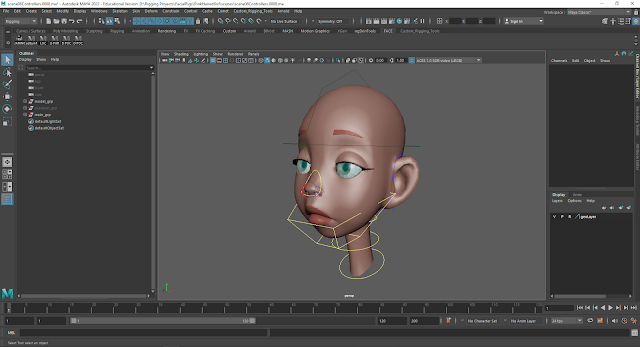
Maya 2022 Main Controllers

At this point I add my constraints to my controllers and clean up their channel box attributes.  I used parent and scale constraints.

Maya 2022 Gif of Controllers Moving Joints

Now that I got my joints connected to my controllers, I'm beginning my first pass at skinning.  I hid the everything except the head geometry so I could focus on just the head.  I then animated the controllers so that while I'm skinning I can see how it looks.

Maya 2022 Gif of Animated Controllers for Skinning

I then skinned the mesh to the joints I selected.  I also at this point went back and fixed a joint in the neck that I thought needed to be improved. Once I played back my animation I saw how the mesh was moving.  There is a lot of work ahead to make this skinning look good!

Maya 2022 Gif of Default Skinning

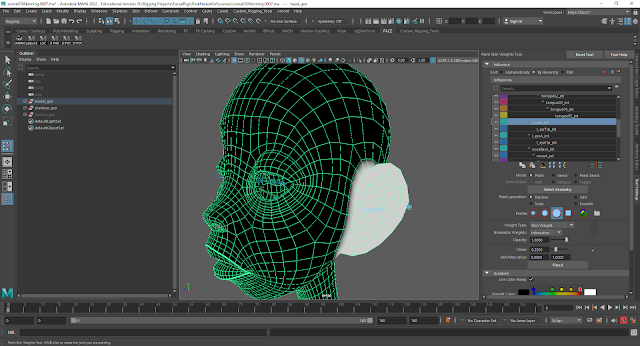
For my process of skinning, I started it off by blocking in the weights.  My first step for fixing the skinning was to use the paint skin weights tool and destroy the default skinning by flooding the skin weights on the first neck joint.  The whole head is set to one on the first neck joint (whole head is white).  Then I selected the edges that will be effected by my second neck joint and then pushed to vertices so that I had the vertices selected.  Going back into the paint skin weights tool I then selected the second neck joint and pushed flood. In the area that I had the vertices selected, the skin weights moved to the second neck joint. 

Maya 2022 Moving Skin Weights to Other Joints

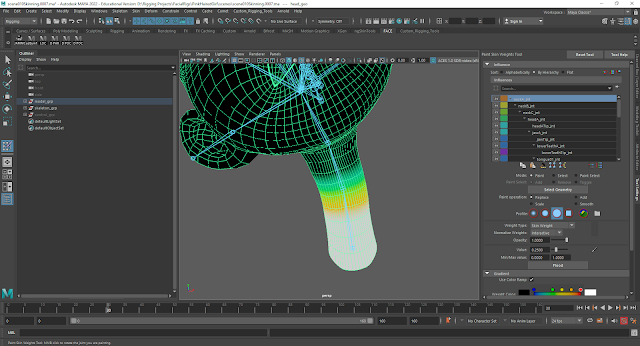
I repeated the same steps to skin the head.  I took all the vertices that weren't skinned to the neck and skinned them to the head.  I then manually skinned some vertices to the third neck joint.  

Maya 2022 Manual Skinning on Neck Joint 3

For the jaw I selected an edge that was in the middle of the lips and then pushed to vertices.  I then used shift + . to increase my selection.  From here I flooded my selected vertices to the jaw joint and tested it in the animation.  It looks better but will need some blending and smoothing.  I manually added some more influence  to the jaw and then mirrored it

Maya 2022 Jaw Skinning Animation Test

For the ears I manually painted the weights on and tested it in the animation.  I then mirrored it for the other ear.  

Maya 2022 Left Ear Skinning

I did the same thing for the nose, nose tip, and the nostrils.  I then mirrored and tested the animation.  After seeing the animation I went back in and improved the nostril skinning.  

Maya 2022 Gif of Nose Animation Skinning Test

I worked on the neck a little bit to smooth it out.  I manually painted edge loops between neck joint one and neck joint to blend them.  

Maya 2022 Blending The Neck Joints


I began to smooth out my skin after blocking in the skin weights.  I worked on the jaw first and used NgSkin tools to smooth out the skinning.

Maya 2022 Smooth Skin For Jaw

I also worked on the skinning by the ears and the cheeks to move a little bit when the jaw opens.  The skinning under the jaw as it opens wide also got smoothed out a bit but I will be adding correctives to make it look better when opening the mouth wide. 

Maya 2022 Smooth Skinning on Cheeks and Under Jaw

Continuing to work on the skinning,  I smoothed out the neck, ears, nose, nose tip, and nostrils.  These followed the same process of using NgSkin tools and skinning manually.  Also referring back to the animation and mirroring the weights.  

Gif of Maya 2022 Smoothed Facial Skin Weights

Once I smoothed out the skinning on my head, I just have the eyes, teeth, and tongue left. 

Maya 2022 Eyes and Teeth

For the eyes and the teeth I simply parent and scale constrained them.  It's a little bit faster than skinning them so that is what I did for now.  The tongue I did skin to the tongue joints and then did some smoothing.

Maya 2022 Tongue Skinning

From here I unhid all of the geometry to see all parts of the face stating to come to life!

Gif of Maya 2022 Skinned Face and Joints

Thursday, October 21, 2021

Maya Vs Houdini Vs Motion Builder Manipulation Hotkeys

 As someone who has used many different programs for different projects, I just wanted to talk about the different hotkeys between Maya, Houdini, and Motion Builder. I am someone who lives in maya so the hotkeys are very natural to use.  When I go to different programs, it can be hard at first to use because the hotkeys are different.  Often times without thinking about it, I automatically start using the maya hotkeys while in different programs and it doesn't always work so well.  I call this maya brain.

In maya there are many hotkeys but I'm just going to mention the hot keys for the manipulation tool (translate, rotate, scale).  These are the keys I use most often, so depending on what you work on there are other hotkeys you may use.

The big three hotkeys are:

W: Transform Tool

E: Rotate Tool

R: Scale Tool

You may hear of the Q hotkey, it's the selection tool.


For Houdini, the manipulation tool is a bit different.  It's been a while since I have used Houdini, but when I did some projects in this program getting the manipulation keys is what was hardest for me to get used to.

E: Scale Tool

R: Rotate Tool

T: Translate Tool

R and T are easy to remember because R for rotate and T for translate


Motion Builder also has different hotkeys.  I haven't been in this program for a while but it is a program I want to know more about.  It's hotkeys are easy to remember.

T: Translate Selection

R: Scale Uniform

S: Rotate Selection

Sunday, October 17, 2021

The Facial Expressions and The Types of Facial Rigs

 For the past three years, I have been fascinated by facial rigging.  I absolutely love rigging character's body and continue to learn about rigging props.  I'm taking a facial rigging class that I'm super excited to take at CGMA with Jose Antonio Martin Martin.  In the first week I learned some really interesting points about facial expressions that I never thought about and I wanted to share some of my findings. 

The very first point that I learned about was the fact the facial expressions are the same everywhere.  It doesn't matter your nationality, culture, race, gender, or age as a joyful smile shows happiness to anyone anywhere.    

Smiling Faces From Google

While people have many different expressions, there are the big 6 main expressions which are sadness, anger, joy, fear, disgust, and surprise.  The many other expressions fall into different variants, may be called differently, or is a combination of two main expressions.  
This point really surprised me but it was Darwin who suggested that facial expressions are a universal language because they mean the same everywhere.  Facial expressions are also innate rather than a learned behavior.  This is very different than hand gestures because in different places, hand gestures don't mean the same thing.  Facial expressions can also be broken down into Action Units in the FACS (Face Action Coding System).

I also learned about different types of facial rigs.  The first distinction between the facial rigs is if they are shape based or deformer/joint based, or a combination of all.  
Some facial rigs are stylized and they are created with shapes.  These rigs use FACS plus extra shapes and lots of tweakers and deformers.  Rigs that are stylized are cartoon rigs.  An example would be Ratatouille by Pixar.

Ratatouille by Pixar, Image found on Google

Facial rigs can also be realistic.  These rigs have a lot of shapes and a complete set of FACS.  They also have many combinations and extra shapes and they often have extra rigging set ups but not as many deformers as cartoon rigs.  A good example of this is Thanatos from Avengers Infinity War.

Thanatos from Avengers Infinity War, Image found on Google


The last type of facial rigs are gaming rigs and they tend to be joint based with a few blend-shape correctives.  Because gaming engines have restrictions, facial rigs are created this way.  The engines are becoming more powerful with fewer restrictions so these types of rigs are constantly evolving.  My very first facial rig I did while at FIEA was a joint based rig I created for Hades.

Last of Us Facial Rig Example, Image found on Google

Friday, October 15, 2021

Facs Code Exercise

 This was part of an assignment I did in my facial rigging class to learn more about the Facs Code.  Using images from class and the Imotions Website, I wrote down what I thought each of the expressions used in the Facs Code.  

Expressions with Facs Code Breakdown

Examining Typology on The Pink Haired Girl Model

 For my Facial Rigging class with Jose Antonio Martin Martin at CGMA, I decided to create a facial rig for this Pink Haired Girl modeled by Hannah Kang.  It is a toned down version of the original model but I really liked the design of the character.  I was also curious about rigging hair so I am also excited to learn how to rig hair using this character.  

Maya 2022 Pink Haired Girl by Hannah Kang

Following along with the class, I first checked the model and was seeing the flow of the typology.  I hid the hair. The model is very smooth, so creating wrinkles would not make this character look good.  There is also two stars by the nose and the cheek.  This actually helps the cheeks.  There are a few areas that will be a little problematic like the bridge of the nose or the back of the head just because of the typology but overall the typology looks clean and good to use.

Maya 2022 Pink Haired Girl Checking Typology

I also checked for teeth, tongue, and looked at how the eyes are set up.  For teeth and tongue there is a simple model inside the mouth.  When checking out the eyes I saw that there is an eyeball geo which is clear and then an iris geo which gives the character their eye color. 
 To fix the typology on the bridge of the nose I considered using the quadraw tool and recreating the typology but I felt that I could solve the problem in less time by editing the edge loops.  I took the head model and made it live and then duplicated it.  I hid the original and then worked on my copy of the head geometry.  I then worked with using the multicut tool and edited the edge loops.  The I worked on smoothing out the edge loops and I cut the model in half.

Maya 2022 Face Model Cut in Half

Since I made edits to the typology and smoothed it manually, this makes the typology on the head uneven.  To make it symmetrical I made sure I had the correct vertex points selected and then I put 0 in the X-axis for the absolute value.  This just makes sure that the points are on 0.  Then I selected my typology and mirrored. 

Maya 2020 Fixed Nose Edge Loops and Symmetrical Head

How to see Poly Count in Maya

 This is a very simple setting that allows modelers to see the poly count on their model while they are working on them in Maya.  I was shown this setting by the Prop Modeling Lead on my undergrad project Delivery.  This setting does get turned off if you reset the Maya preferences.  

To turn on this setting, go up to Display and scroll down to Heads Up Display.

Maya 2022 Display - Heads Up Display - Poly Count

Then select Poly Count and it will appear in the top left corner of the scene. 

Maya 2022 Poly Count in Upper Left Corner

Monday, October 11, 2021

Facial Rigging Exercise - Examining Human and Cat Faces

 This was an assignment I did in my first week of facial rigging class.  We went in the internet and found expressions that showed the 6 main expressions: joy, sadness, fear, anger, surprise, and disgust.  Out of my own curiosity I also examined facial expressions on cats.  Animal facial expressions are different from human expressions since their muscles are different or there are certain muscles they don't have.  Often times in film and video games the faces on animals are given features that look like the same features on our faces so we can connect better with the character.  

Human Facial Expressions for Each of The 6 Main Expressions

Cat Facial Expressions for Each of The 6 Main Expressions


Human Disgust Example

  • Eyebrows are compressed
  • Eyes are squinted but shut
  • Nose is sneered and pointed shape
  • Lips and chin both push up
  • Tongue is sticking out a little bit
  • Mouth has a square like shape

Joy Human Example

  • I think this joy example has a little bit of surprise in it too
  • Eyes are wider but the bottom eye lid is being pushed upwards
  • Eyebrows are raised which is causing the wrinkles on the forehead
  • Wide mouth with teeth showing
  • Big puffy cheeks with nose widened
  • Shape of the mouth is like a soft edged triangle
  • Ears are raised a little bit

Human Sadness Example

  • Lowered Eye brows with clenched closed eyes
  • Cheeks are folded and puffy
  • Nose is widened slightly
  • Mouth is lightly pressed and widened
  • Face looks like it squishes

Human Fear Example

  • Has a little bit of surprise
  • Eyebrows lift
  • More white in the eyes
  • Top and bottom eyelids open more
  • Mouth is open with square shape

Human Anger Expression

  • Eyebrows are lowered and brought to the center
  • Nose is sneered and lifted
  • Folded cheeks
  • Square Mouth
  • Teeth is shown
  • Upper lip is pulled upwards

Human Surprise Example

  • Eyebrows are wrinkled causing wrinkles on the forehead
  • Eyebrows are pointed in the middle of the eyebrow
  • Eyes are more widened showing more white
  • Mouth is opened showing a circular o shape.
  • Cheeks look like they got sucked inwards

Cat Example of Disgust

  • Eyes are squinted shut
  • Nose is sneered
  • Muscles by the whiskers are lifted
  • Jaw is opened showing some teeth

Cat Example of Sadness

  • Eyes are dark and have an almost sinking into his head look
  • Crippled left ear
  • upper eyelid is lowered
  • Mouth is droppy
  • Whiskers are pointed downwards
Cat Surprise Example

  • Eyes are opened really wide
  • Pupils are dilated
  • Ears are to the side and a bit flattened
  • Jaw is dropped a little bit
  • Tiny bit of tongue sticking out
  • Whiskers are pointed downwards following the jaw
Cat Example Fear
  • Eyes are wide
  • Pupils are dilated
  • Ears are forward
  • Whiskers look lifted
Cat Example Angry
  • Top lids are lowered
  • Pupils are dilated
  • Ears are back and flat against the skull
  • Nose is sneering
  • Whisker muscles are pushing upwards
  • Whiskers are spread out around the sides of the cats face
  • Mouth is opened wide
  • Teeth is shown
  • Tongue is able to lay flat and roll at it's edges
Cat Happy Example

  • Ears are high and forward
  • Eyes are wide
  • Pupils are dilated
  • Mouth is opened showing small amount of teeth and relaxed tongue
  • Muscles by the whiskers are lifted
  • Mouth shape is like a soft edged triangle

Scaling Your Controllers when they are Connected

 Sometimes when you are working on a rig, you may need to go back and adjust your controllers size a little bit.  This is possible without b...