Showing posts with label PixarsRenderman. Show all posts

Saturday, March 12, 2022

Pixar's Renderman: Analytic Lights and PxrMeshLight

 When I was learning Pixar's Renderman for my student film Delivery, during my research I learned about analytic lights and how they effect render times.  I am not a lighting artist but its still very good to know how Renderman calculates lights especially if you have a special case that is uses lighting differently. 

The primary mode of lights in renderman are called analytic lights because they are economical to render time.  They are highly mathematical modeled lights, highly efficient, and they use aerial lights.  Thus they are calculated cleaner and give us a faster result. 

    Analytic lights include:

  • PxrRectLight
  • PxrDiskLight
  • PxrDistentLight
  • PxrSphereLight
  • PxrDomeLight
  • PxrPortalLight
  • PxrEnvDayLight


Autodesk Maya 2022 Renderman's Analytic Lights

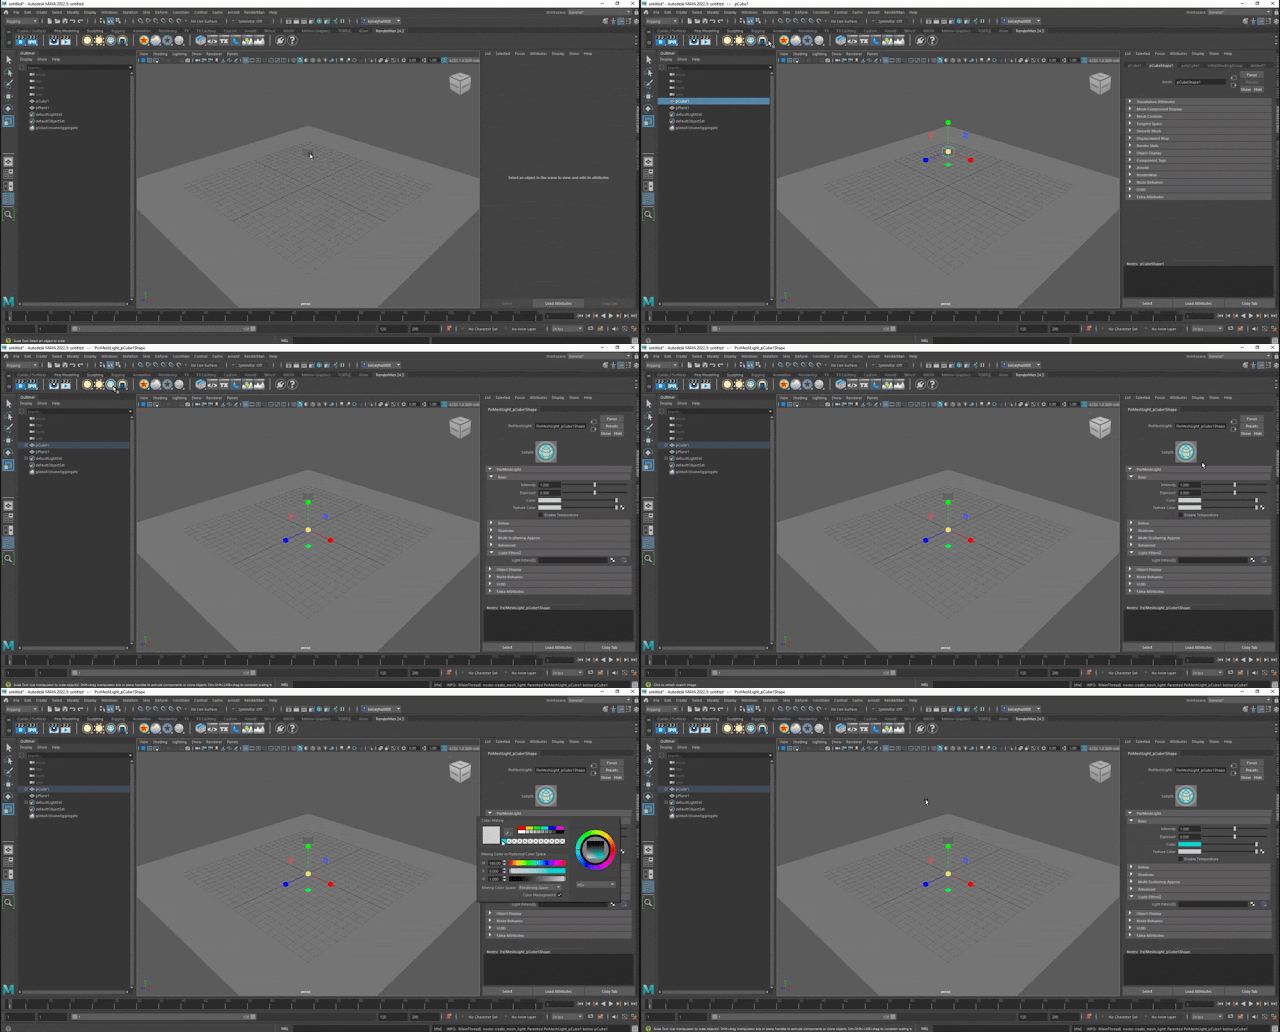
An example of a light that isn't analytic is the PxrMeshLight.  If you use this light, you won't get the same speed and cleanliness in the scene.  What the PxrMeshLight does is it makes objects emissive.  It's better than a glow material but it is not economical like analytic lights.  This does not mean to not use this light, sometimes you do need to use this light for objects that are illuminating.  

How to use the PxrMeshLight: 
  1. Select an object in your scene.
  2. Select it's icon on the Renderman shelf. 


    3.  To edit it's settings, simply click on it's node under the object you put it on in the outliner. In the channel box you can edit each of the settings. 


Gif of Autodesk Maya 2022 Applying the Renderman's PxrMeshLight


Autodesk Maya 2022 Example of Renderman's PxrMeshLight

Sunday, November 7, 2021

Rigging Demo Reel 2021

Rigging Demo Reel 2021

This is my rigging demo reel for 2021.  It shows my two biggest projects I have worked on as well as a facial rig I created.  The music used in my demo reel is called Summer Time by MorningLightMusic.

My first rig shown is the hellhound named Lucy from UCF's Character Animation short animated film Delivery.  I am responsible for her animation and rig.  This is a test animation I created for Lucy when working on the film.  I took this animation further when I worked on it in animation class while at UCF's Florida's Interactive Entertainment Academy.  
My second rig shown is Zenko from Zenko: A Fox's Tale.  I created his rig while on the Wolf Packtics team at UCF's FIEA program (Florida's Interactive Entertainment Academy).  I am also responsible for his animation fixes and clean up.  The Zenko cinematic was done in Unreal Engine 4.
My third rig shown is for a character named Hades.  He was modeled by Ky Campbell.  Hades is a character from an indie game called Kore by Penguin Void Productions.  Kore was also a game created in Florida's Interactive Entertainment Academy.  

Feel free to also check out their individual reels on Youtube, Vimeo, or Instagram to see more of their rigs!

Sunday, October 24, 2021

Renderman Buckets in Maya

 I learned about Renderman in my undergrad when working on Delivery.  It has become one of my favorite renderers to use in Maya because of how it works but also because it's what Pixar uses to render their films.  I'm very inspired by Pixar.  In this post I just wanted to talk about buckets.  You often see buckets when you are rendering an animation and it takes a long time.  They have a big impact on how quickly and the order of where the scene will start to render.  In this post I'm going to talk about how to change the bucket size and how to change the bucket order.  

How to change bucket size:  First you need to know that the bucket size effects the blue boxes on the IPR if you have them visible.

The first step to changing your bucket size is to open your Renderman Settings, this could also be your rendering settings.  In the popup click on the Renderman tab next to the Common Tab.

Maya 2022 Render Settings Renderman Tab

In the Advanced tab in the Render Options tab you will find Bucket Size. Click the down arrow to select a size.  The reason you want to change the size is because for certain outputs it makes a difference.  It takes longer for a scene that is large with a small bucket size to render.  Changing this also has an effect on Batch Renders and Final Renders.  

Maya 2022 Renderman Bucket Size

Since we understand how to change the bucket size when we need to,  how do we change the order?  Changing the order of your rendered scene does not effect your rendering, it's more so for your own preference.  

To start this, you need your Renderman settings open.  If you already have it open, then you're good.  Then in the popup just click Renderman next to the Common tab.  In the Render Options tab you will find Bucket Order.  Click the down arrow and select your preference.  

Maya 2022 Renderman Settings Bucket Order

Scaling Your Controllers when they are Connected

 Sometimes when you are working on a rig, you may need to go back and adjust your controllers size a little bit.  This is possible without b...